What are triggers?

A Trigger is not required if you only plan to run an Agent manually.
Organize triggers with tags
Use trigger tags to label related triggers by team, workflow, customer, or purpose. Tags are shared across your workspace and can be created, renamed, recolored, or deleted from the tag picker on any trigger. On the main Triggers page, use the Tags section in the sidebar to filter the list. Selecting more than one tag shows triggers that have any selected tag.How to create triggers
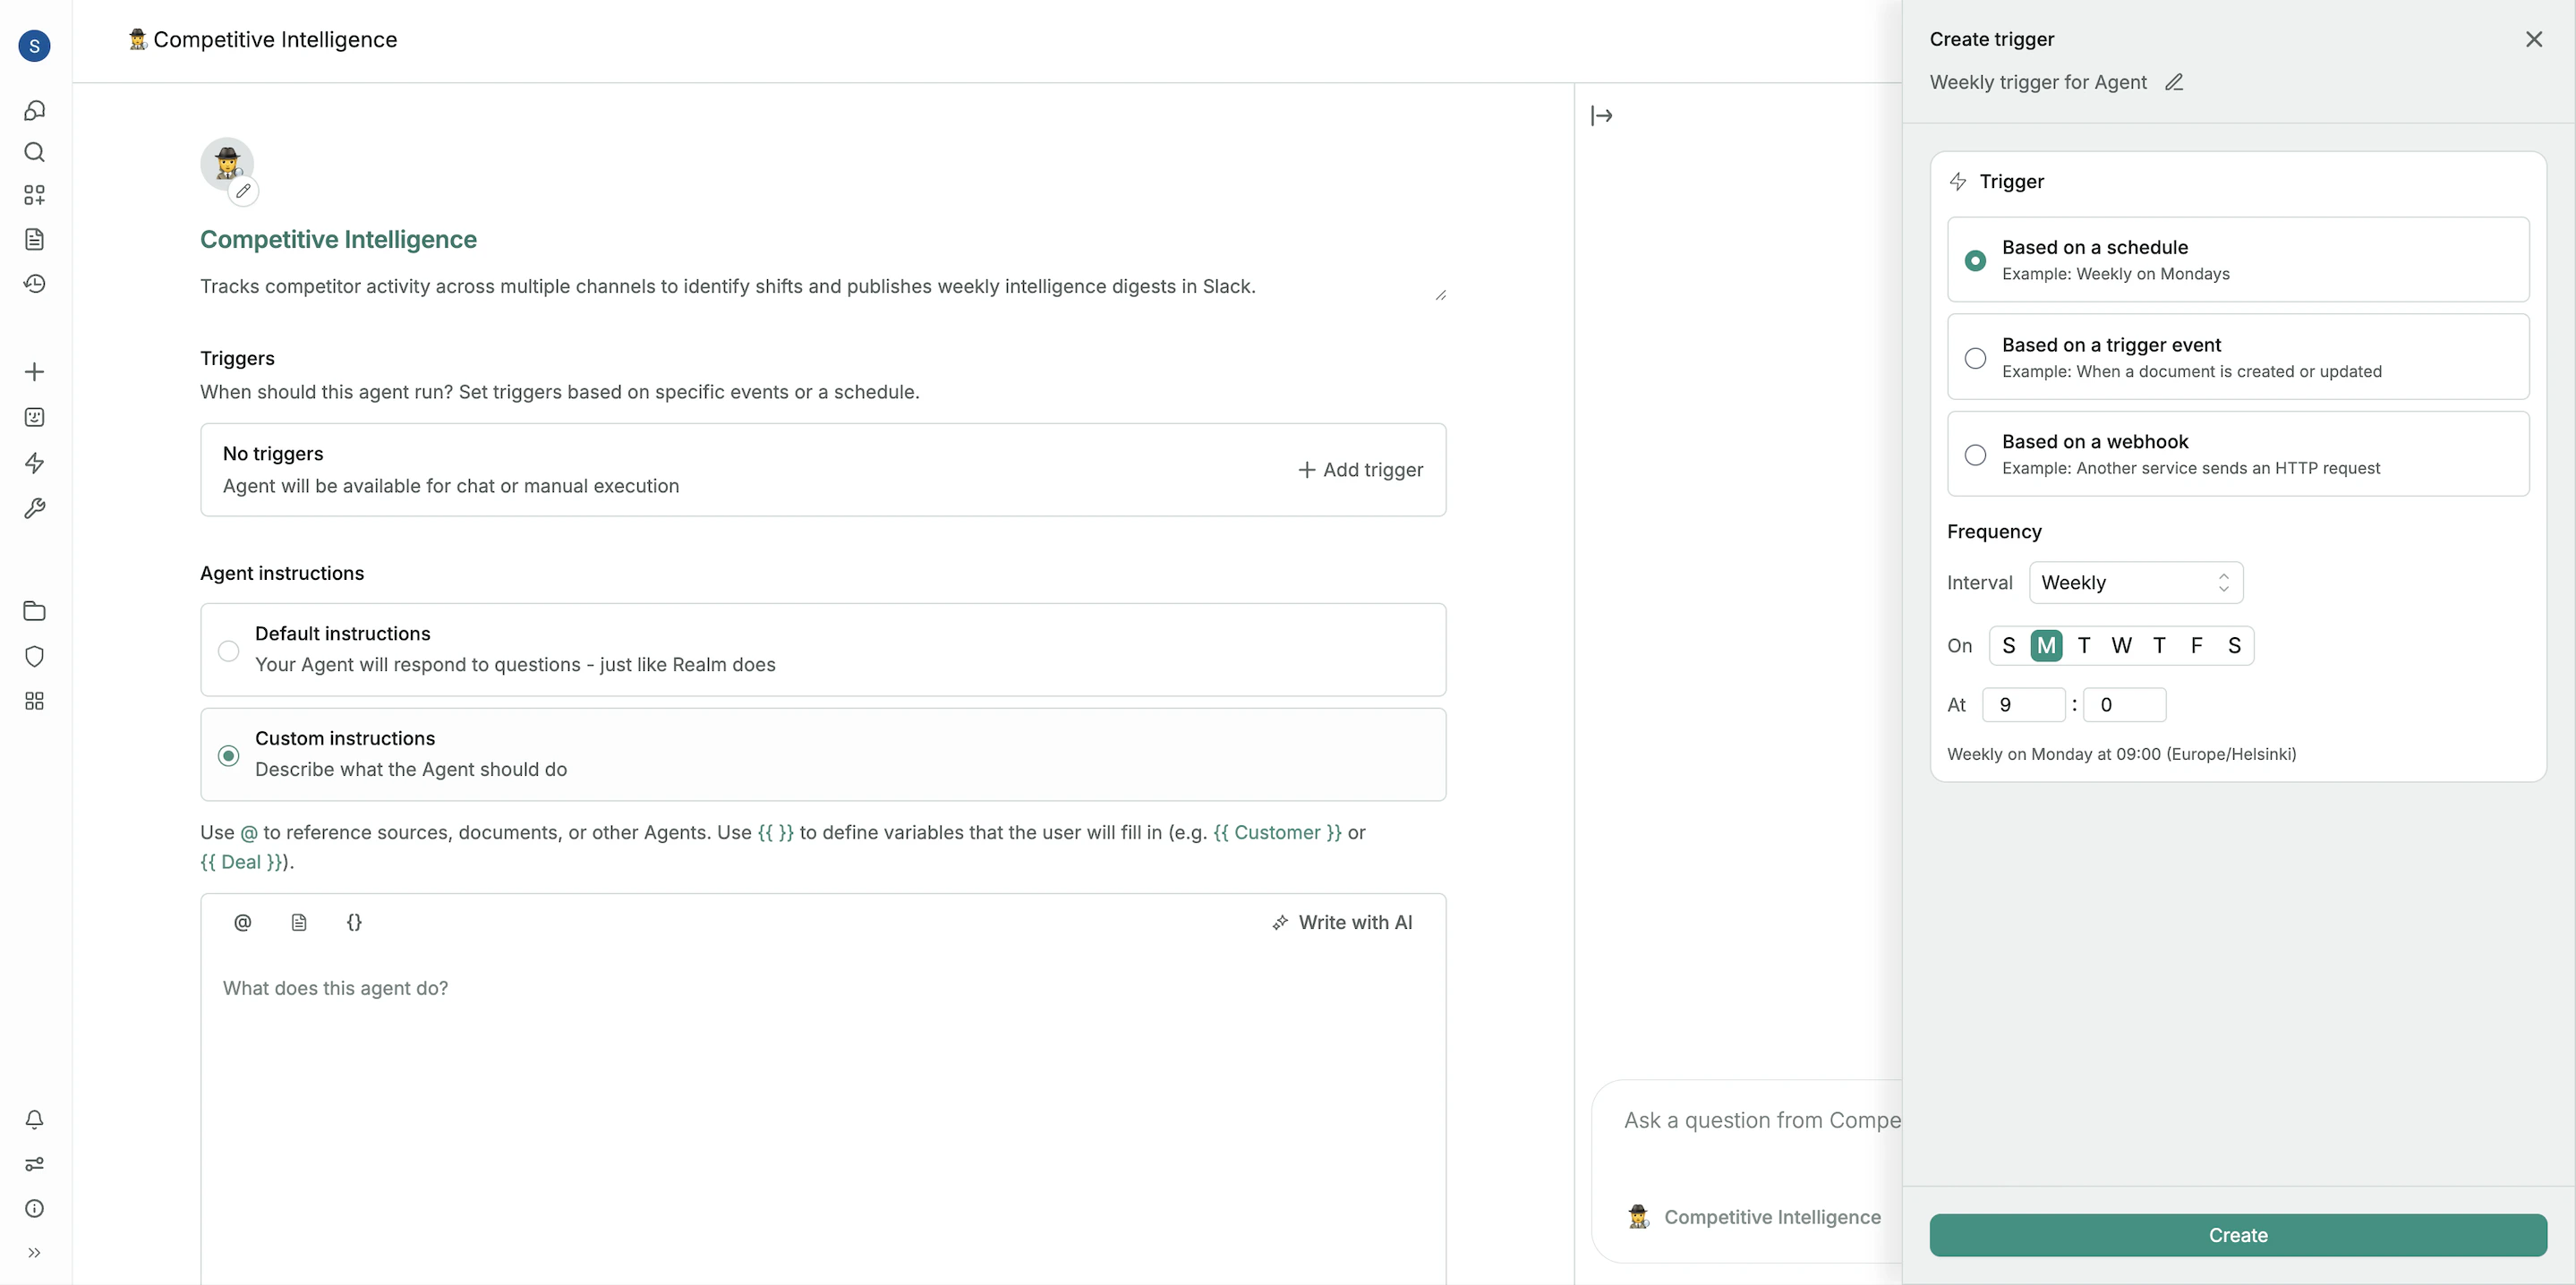
All trigger types include a Timeout setting. Choose 15, 30, 60, or 120 minutes, or choose Uncapped for runs that should not stop automatically. If you do not change this setting, Realm stops a trigger run after 60 minutes.Based on a schedule
Based on a knowledge event
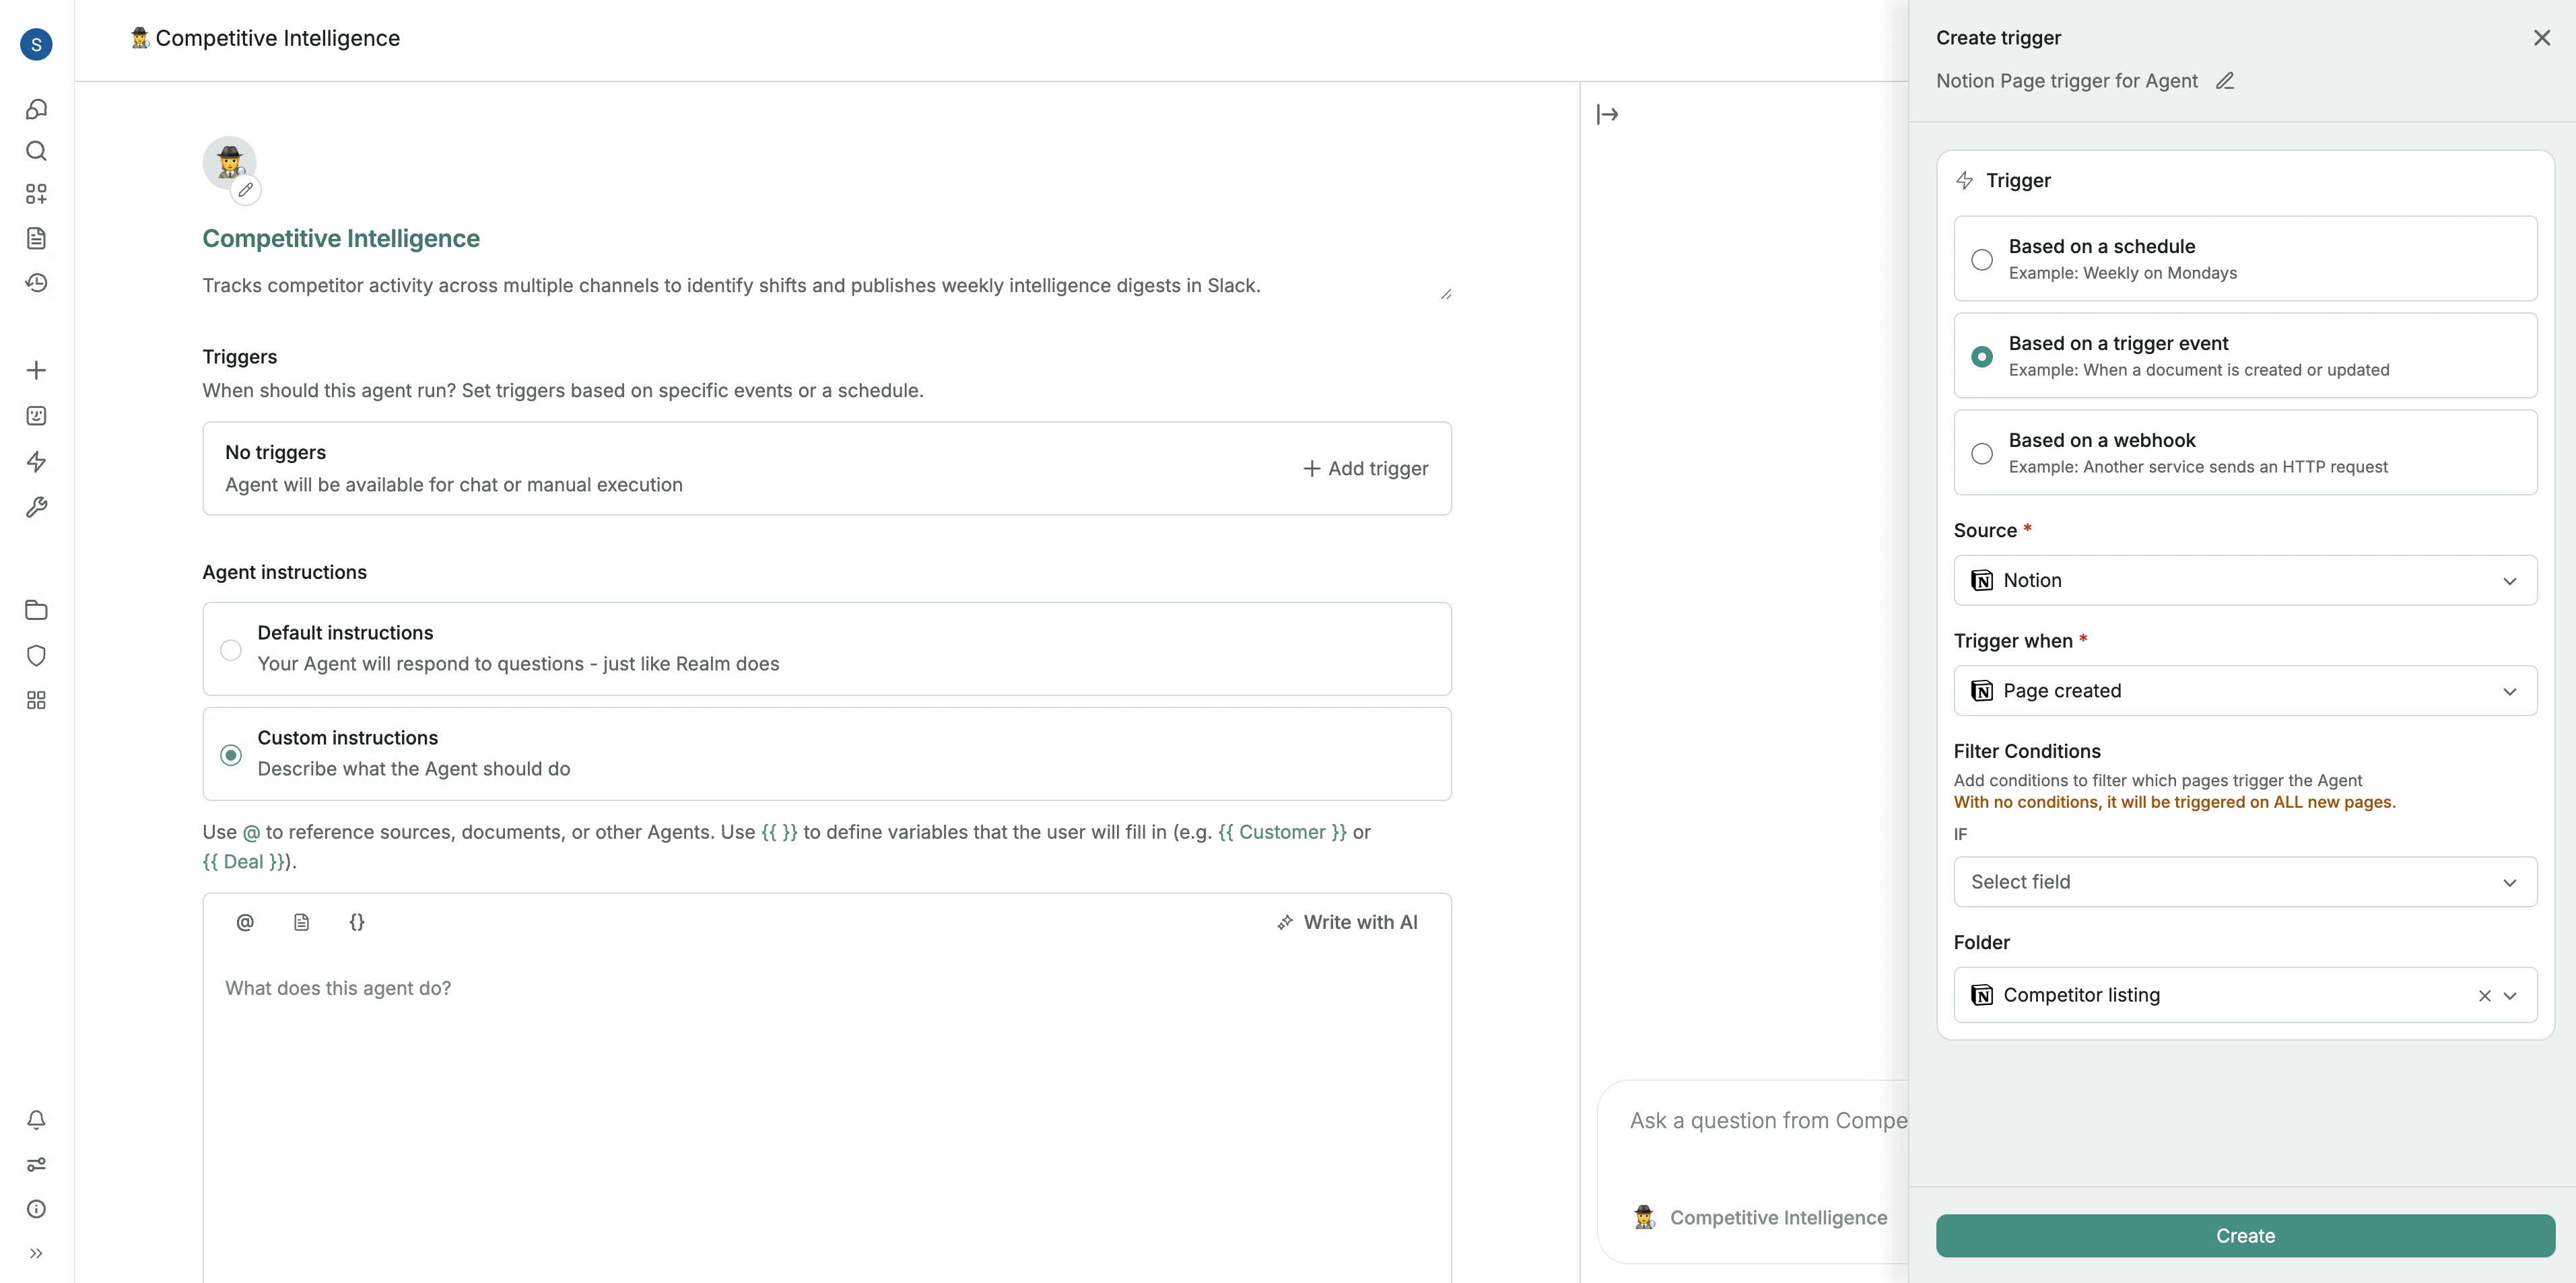
- Source: The connected application where the event originates, such as Gong, Salesforce, HubSpot, Slack, Google Drive, Jira, or Zendesk. Only connected sources are shown.
- Trigger when: The item type and change type that starts the Agent. Realm builds these options from the selected source’s supported content types, such as Opportunity updated, Deal updated, Ticket created, Call created, Thread created, or Thread reply added.
- Filter conditions (optional): Rules that control precisely when the Agent runs.
- If: Set conditions based on the changed item. For example, only run the Agent when an Opportunity’s Stage changes to Closed Won, when an Owner field is not empty, or when a call’s duration is longer than 10 minutes.
- Folder or Channel: Restrict the trigger to a specific folder, channel, or similar location within the source application. Slack triggers require a channel. Other sources can usually be left unrestricted.
Options of the Trigger when field
After you select a Source, Realm shows the event options available for that source. Each option pairs a supported item type with the event that can start the Agent:| Pattern | Meaning | Example options |
|---|---|---|
| Item created | A new item of that type was synced | Opportunity created, Deal created, Call created |
| Item updated | An existing item of that type changed | Opportunity updated, Deal updated, Ticket updated |
| Item reply added or Item activity added | A new reply, comment, or activity was added to an existing parent item | Thread reply added, Opportunity activity added, Deal activity added |
Conditions on updated events
Updated events require at least one Filter condition. The Agent runs only when a condition field changed and the new value matches the condition. For example, to run when a Salesforce Opportunity is moved to Closed Won:- Source: Salesforce
- Trigger when: Opportunity updated
- Filter condition: If Stage equals Closed Won
- Source: Gong
- Trigger when: Call created
- Agent action: The Agent receives the call transcript, summarizes it, searches for competitor names against a predefined list, and sends a summary with action items to a specific Slack channel.
- Source: Salesforce
- Trigger when: Opportunity updated
- Filter: If Stage equals Closed Won
- Agent action: The Agent gathers context from recent activities, generates a concise “Win Reason”, and updates the corresponding field in Salesforce.
- Source: Salesforce
- Trigger when: Opportunity activity added, Task created, or Event created, depending on the activity you want to catch
- Filter: Optional, such as If Reply Type equals Task
- Agent action: The Agent reads the Opportunity context and the new activity, then sends a Slack message to the owner.
- Add Salesforce as knowledge or as a tool, depending on whether the Agent only needs synced CRM context or also needs to run live Salesforce actions.
- Add the Google Sheets tool and enable the read and write actions the Agent needs.
- Make sure the spreadsheet is selected with Google Picker before the Agent writes to it. See Updating Google Sheets for the detailed setup.
- Set write actions to Ask while testing. Change them to On only after the Agent reliably writes the right rows and values.
- Use preset parameters for stable values the Agent should not choose, such as the Spreadsheet ID and a fixed sheet or range pattern.
- Let the Agent fill dynamic values, such as the row to update and the cell values, when those depend on the triggered Opportunity or the current sheet contents.
- Source: Salesforce
- Trigger when: Opportunity created or Opportunity updated
- Filter: Add conditions for the changes you care about, such as If Stage equals Proposal or If ARR Growth is greater than 100000.
- Agent instructions: Tell the Agent to read the triggered Opportunity, check whether that Salesforce Opportunity ID already exists in the sheet, then update that row or add a new row.
Event triggers react to future create, update, and activity events as Realm syncs them. They do not bulk-import every existing CRM record. For an initial backfill, run an Agent manually or on a schedule and instruct it to search Salesforce for the records to add before the event trigger handles future changes.
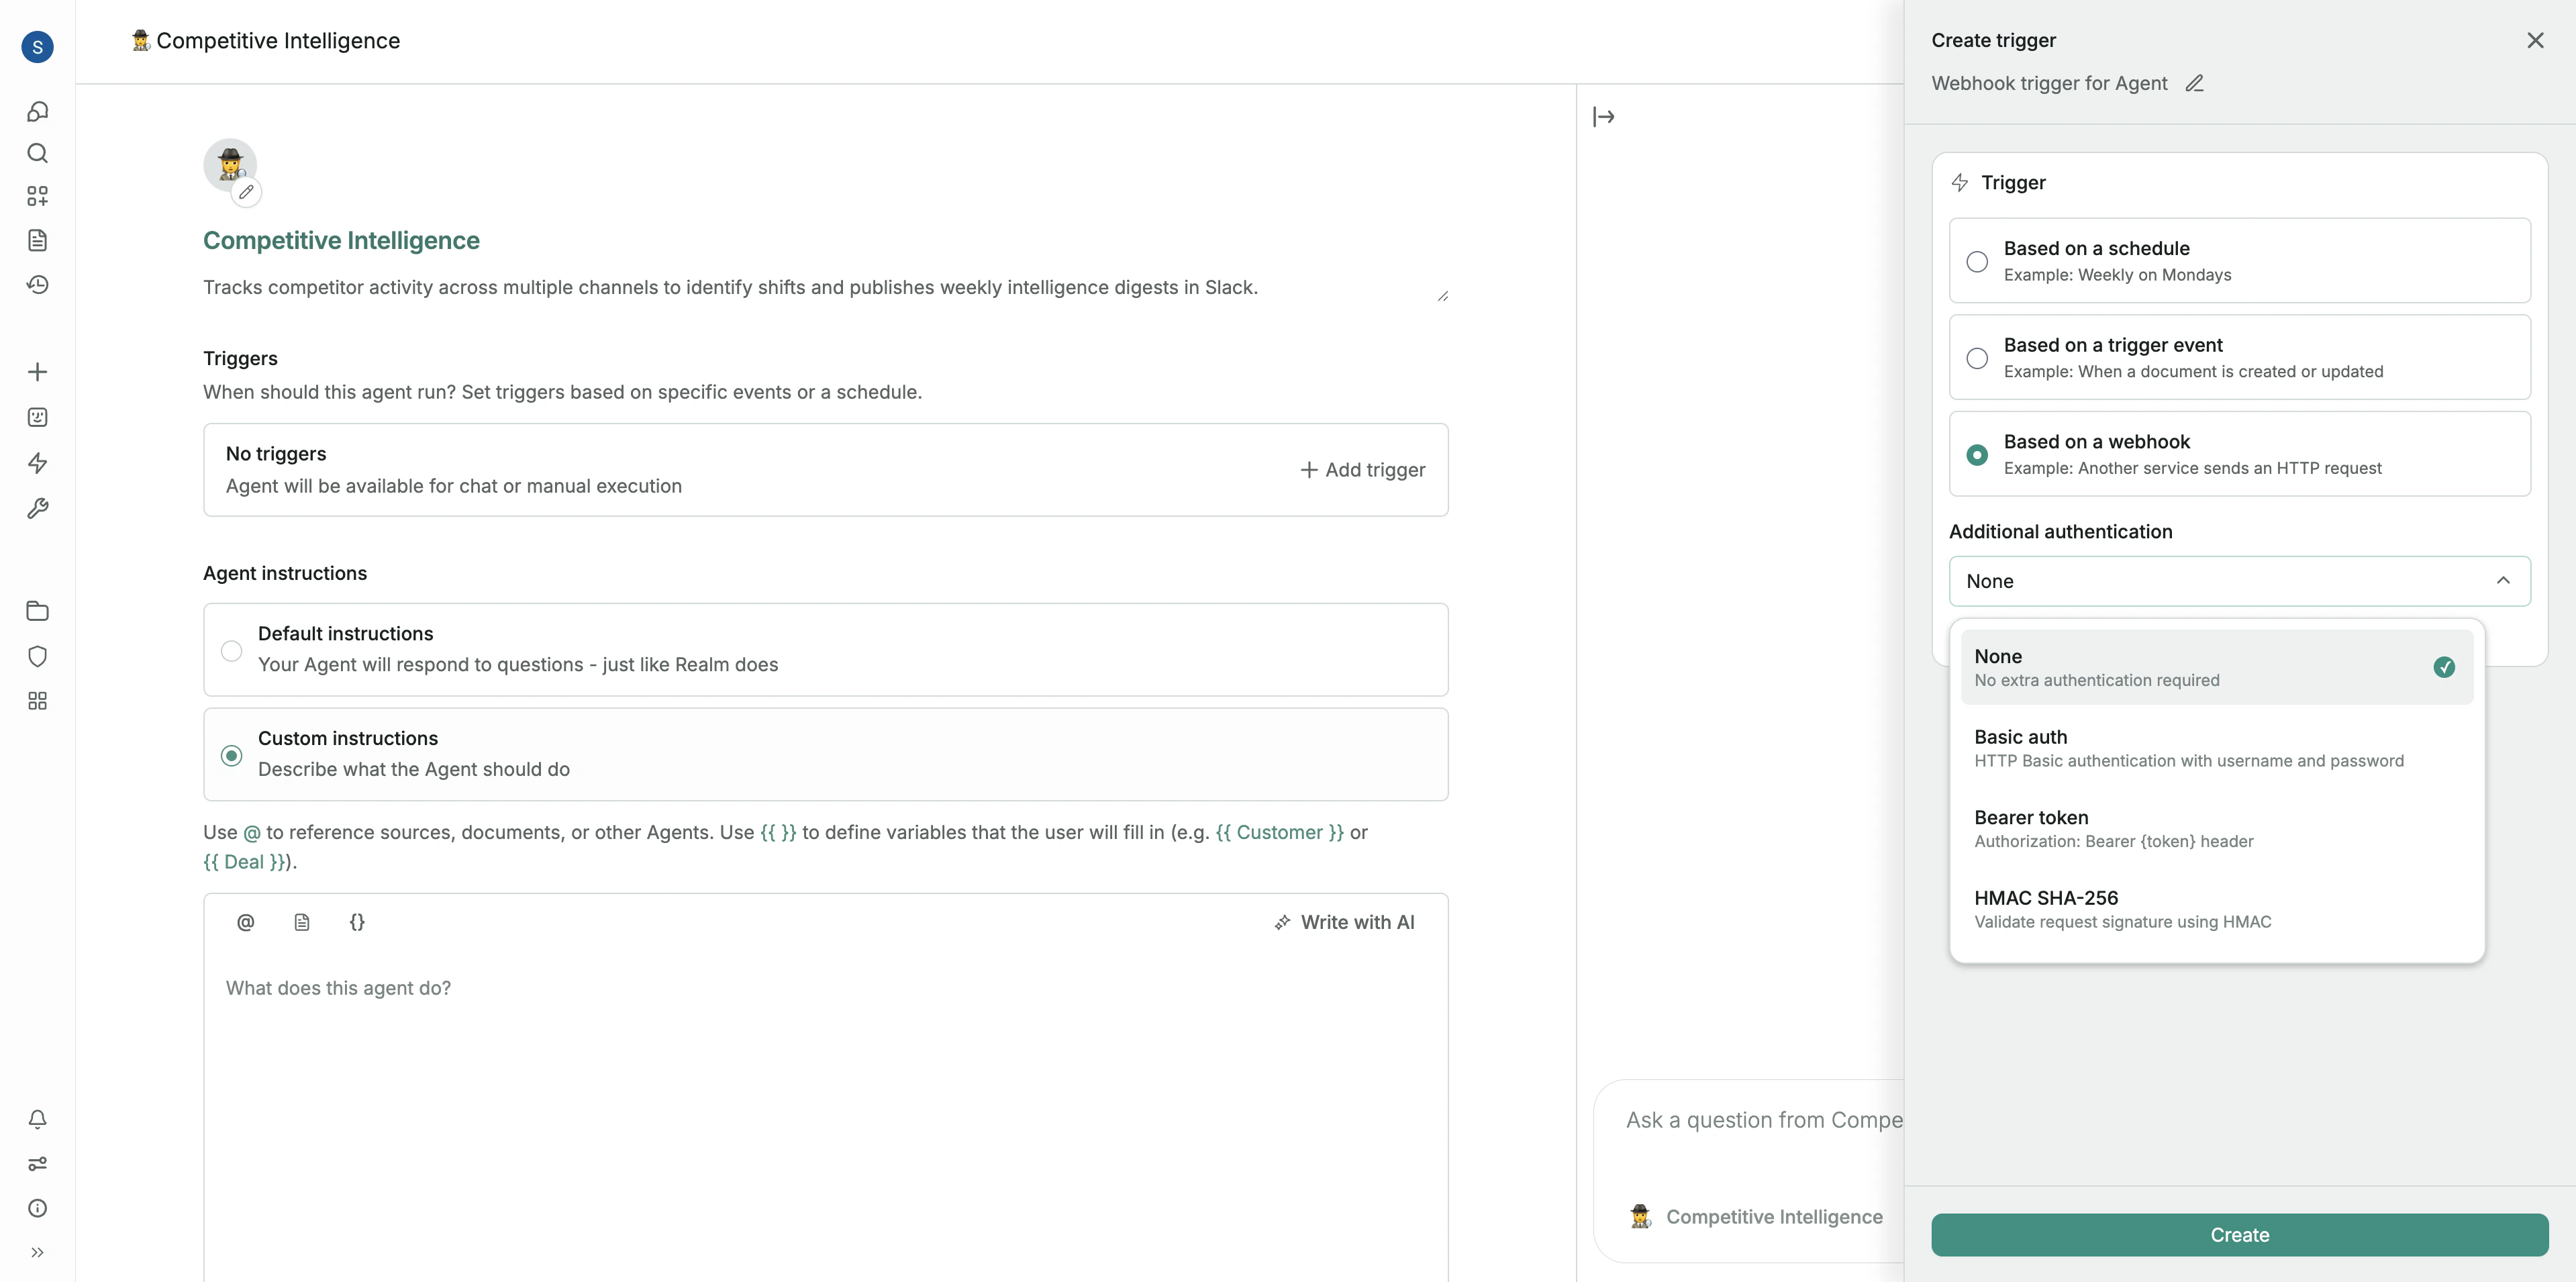
Based on a webhook
- Select trigger type: Choose “Based on a webhook” when creating your trigger.
- Copy the webhook URL: Realm will generate a unique URL for this trigger. Copy this URL.
- Configure the external system: Paste the copied URL into the webhook configuration section of the external tool you want to trigger the Agent from.
- Choose authentication (optional): Select an authentication method to secure your webhook and ensure only authorized systems can trigger your Agent.
Run history and monitoring
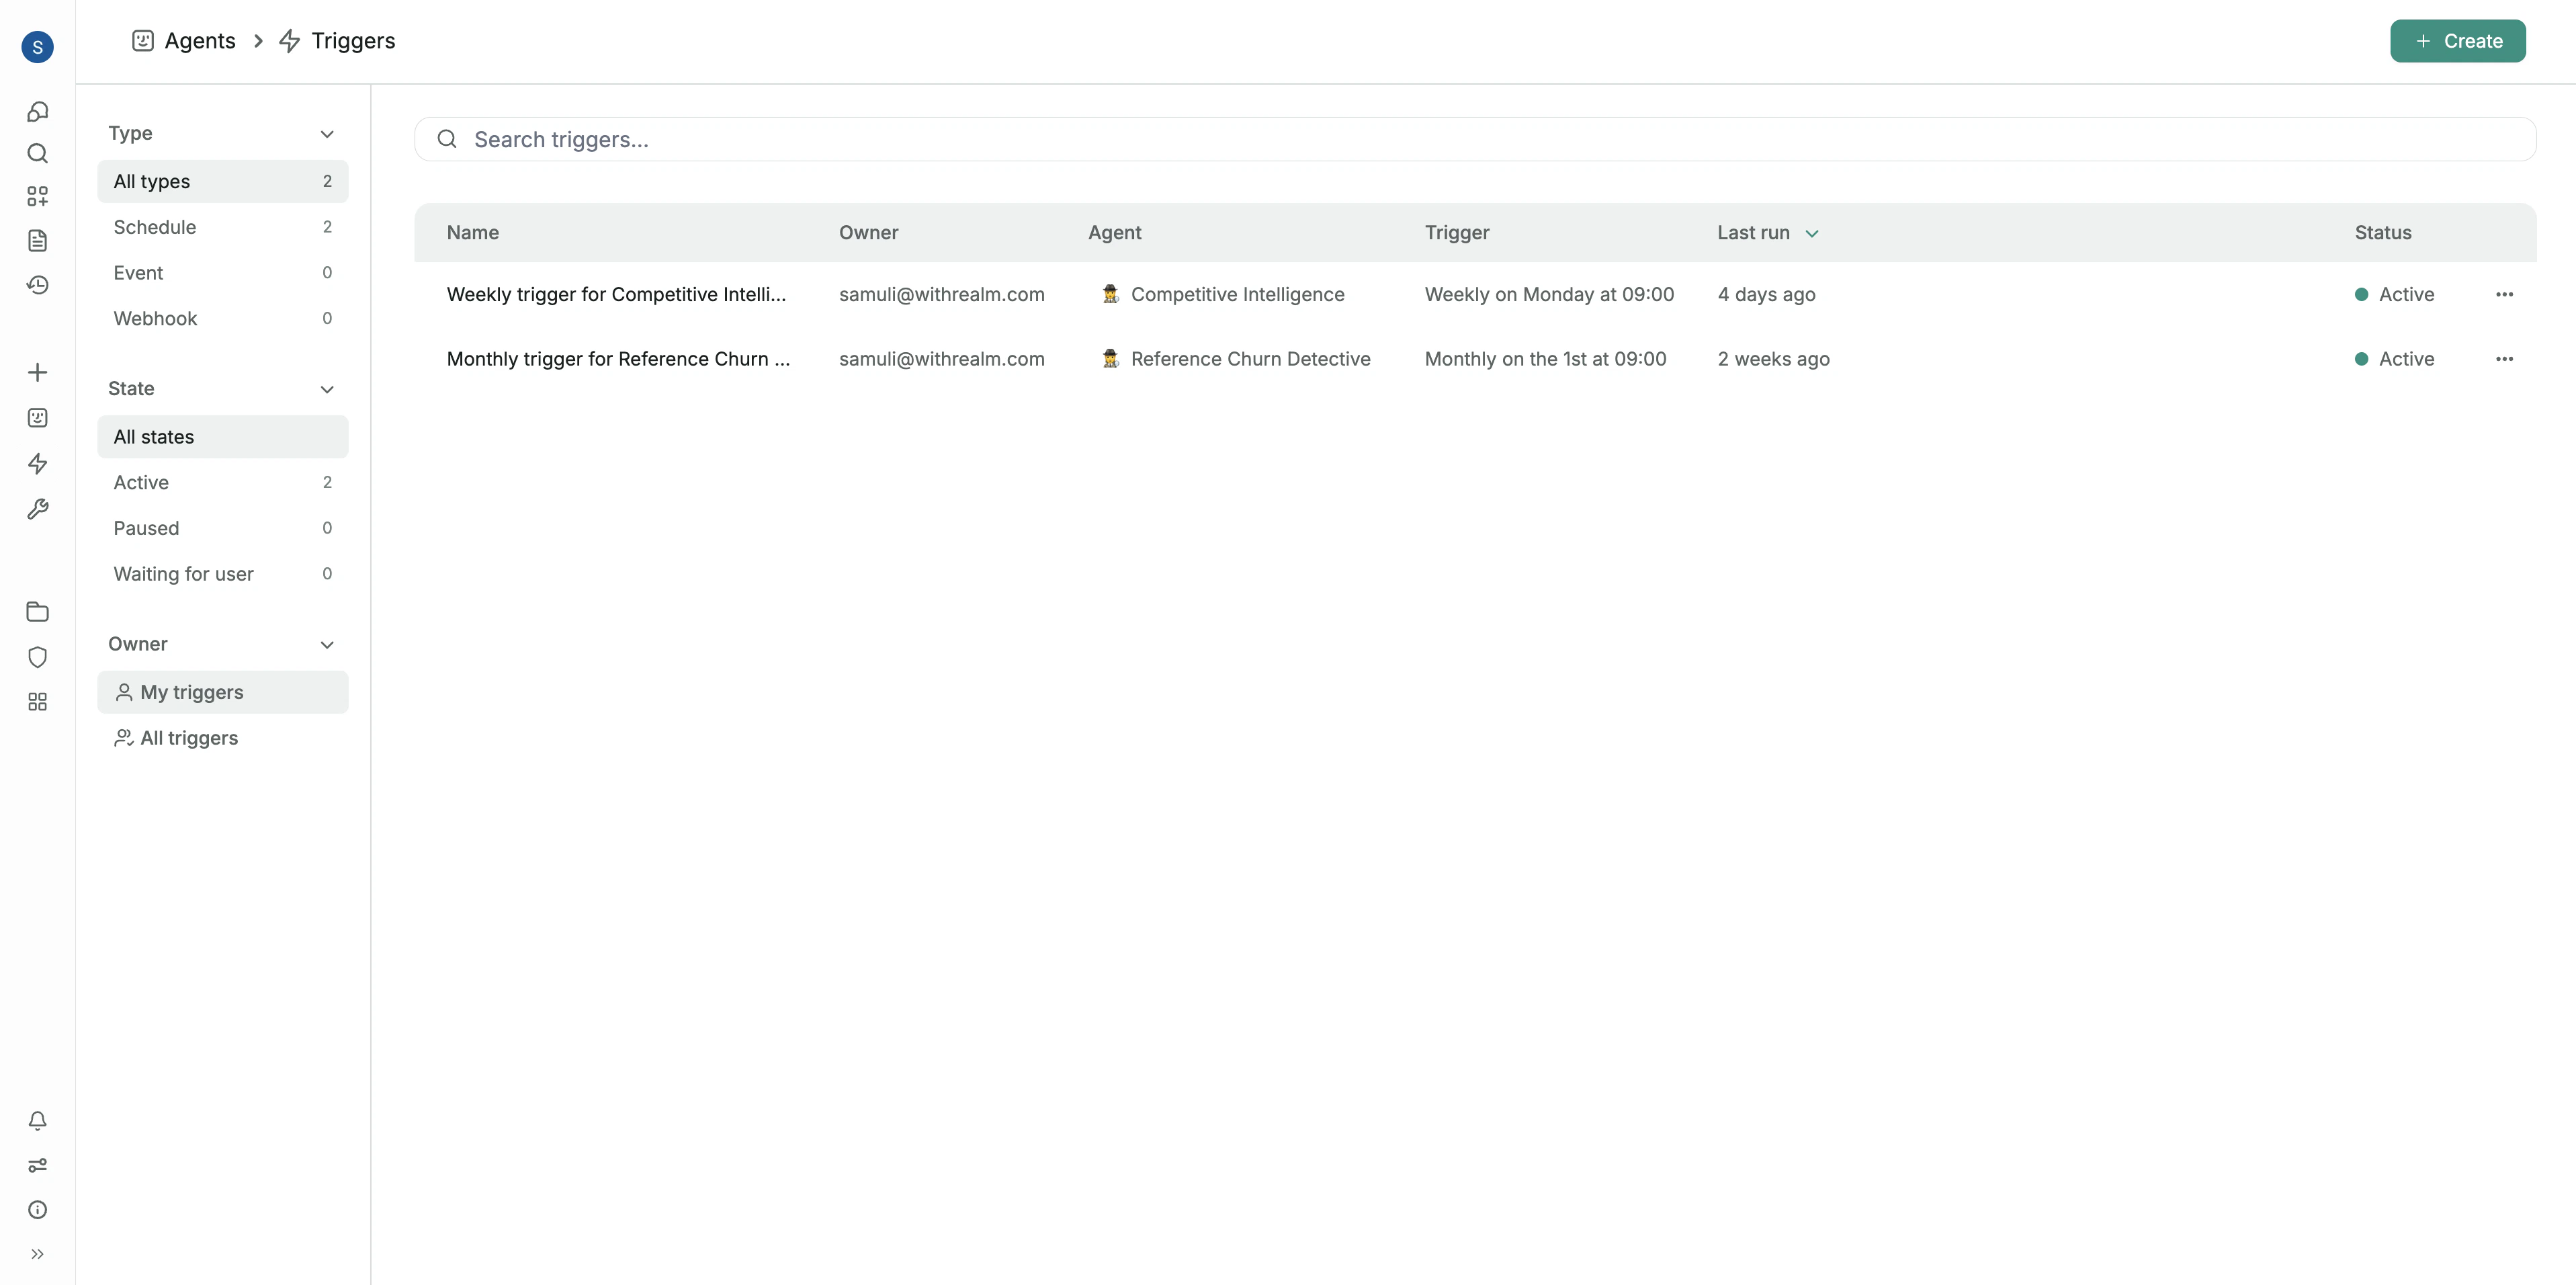
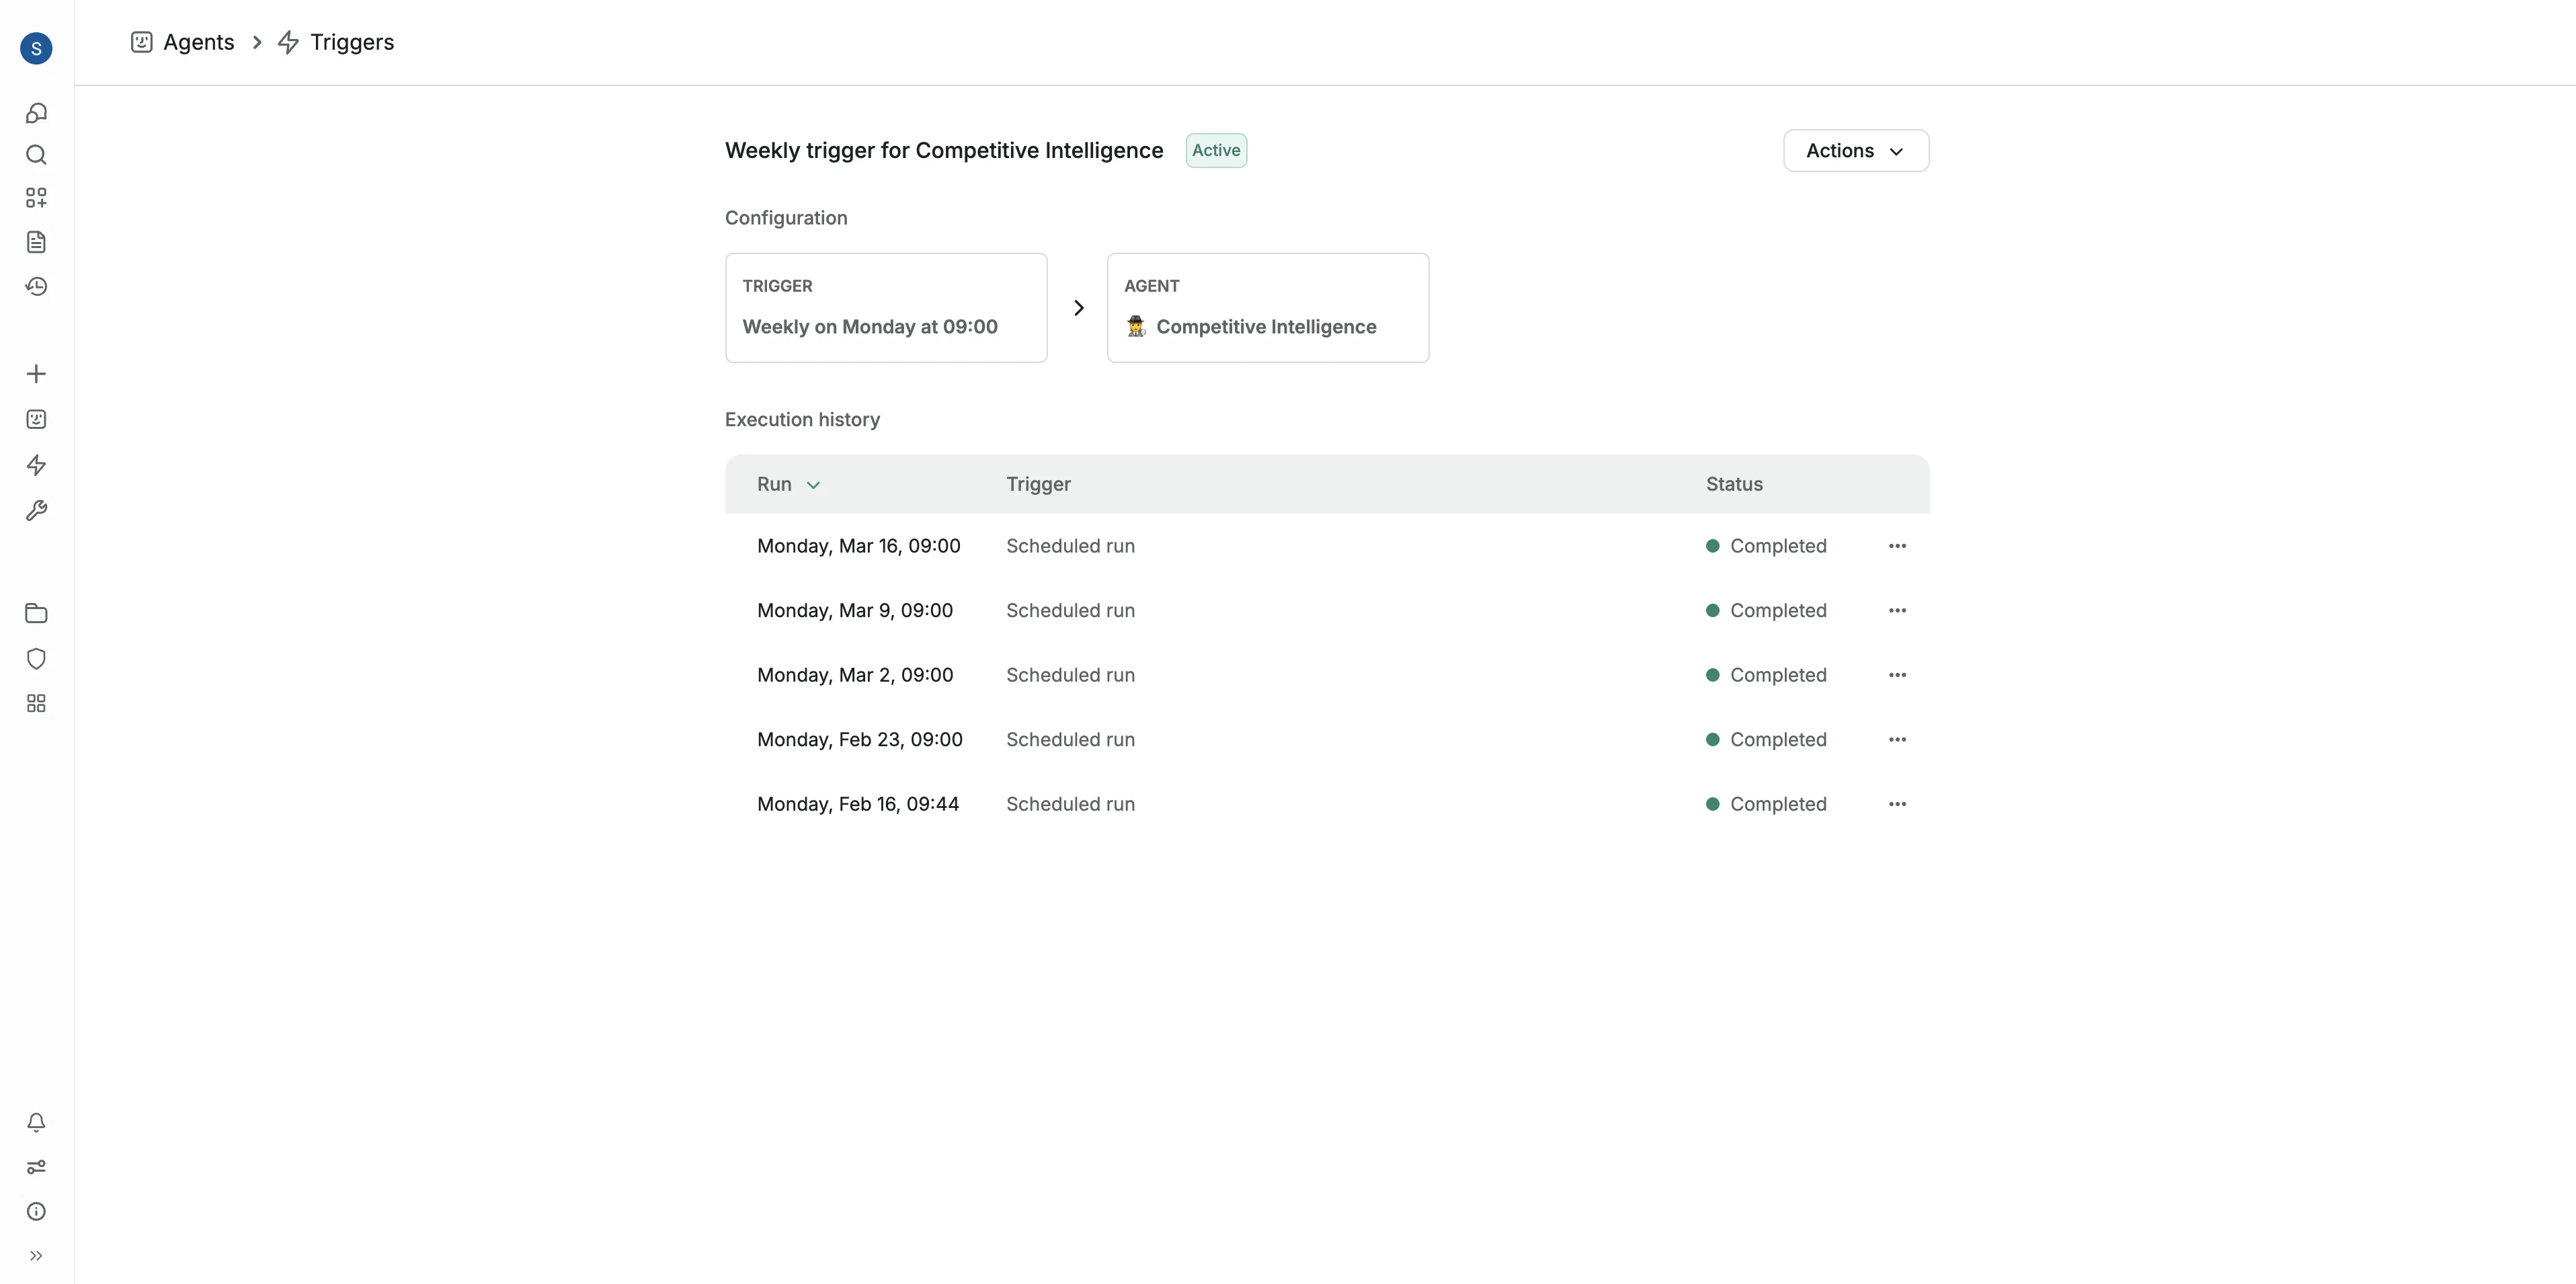
Trigger details page
What you can see
- Trigger status in the list view, such as Active
- Last run in the list view
- Execution history on the trigger detail page
- Configured timeout on the trigger detail page
- Run status for each execution, such as Completed or Timed out
Why it is useful
Use run history to:- Confirm that a trigger is firing as expected
- Check when the trigger last ran
- Review whether recent executions completed successfully
- Track trigger activity over time
- Manually run a trigger with its normal input, a selected document, a webhook payload, or raw text input when testing
Monitoring tips
- After creating a trigger, check its Status and Last run in the list view to confirm it is active and running
- Open the trigger detail page to review Execution history
- Use the history table to verify that scheduled runs are completing as expected
Troubleshooting a trigger
If a trigger does not run as expected:- Confirm the trigger is enabled
- Check that the trigger conditions are correct
- Verify that the source system is sending the event or webhook
- Review the most recent run history for errors or skipped runs