Creating a project
Create project
From the RFPs page, click the Fill RFPs button. In the type picker, choose Create project.
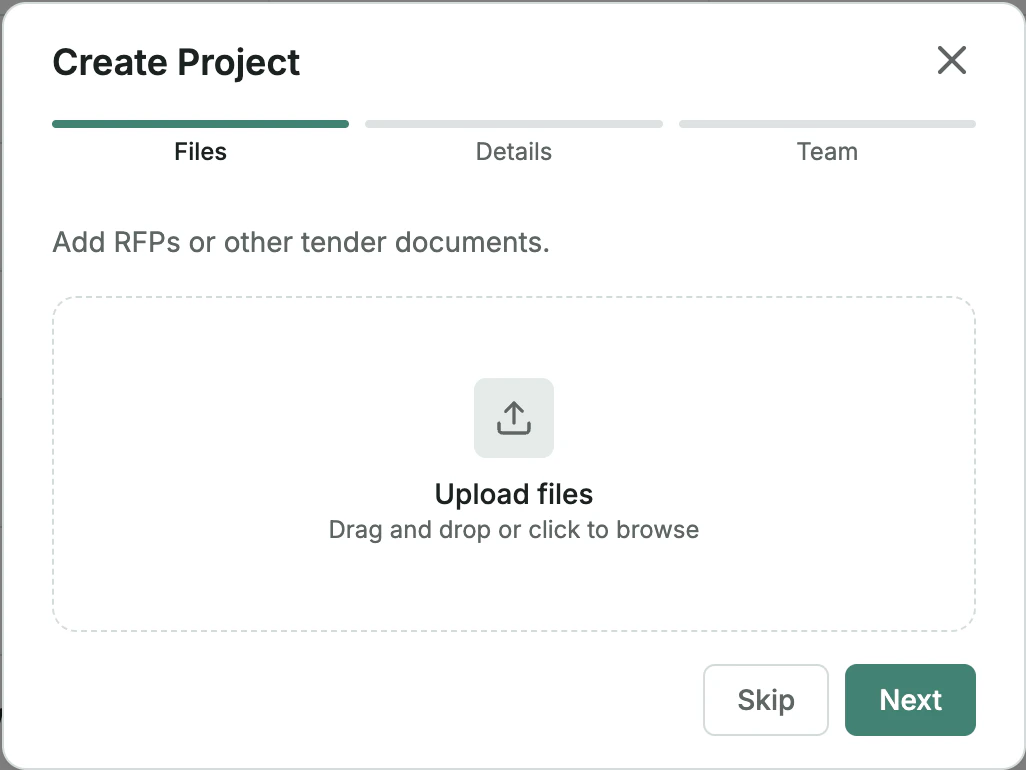
Upload files
Upload the files. Realm supports .xls, .xlsx, .csv, .pdf, and .docx formats. Once you upload materials like questionnaires, Realm parses and analyzes its contents automatically. It extracts questions, identifies sections, and prepares the document so AI can generate responses.
Configure project
Enter a name for the project and optionally add a description, deadline, and tags. If you set a deadline, team members assigned to the project will receive reminders three days before, one day before, and on the day of the deadline. The deadline is also visible in the Progress tab.
You can also upload and complete a single questionnaire directly, without creating a new project.
Project view and tools
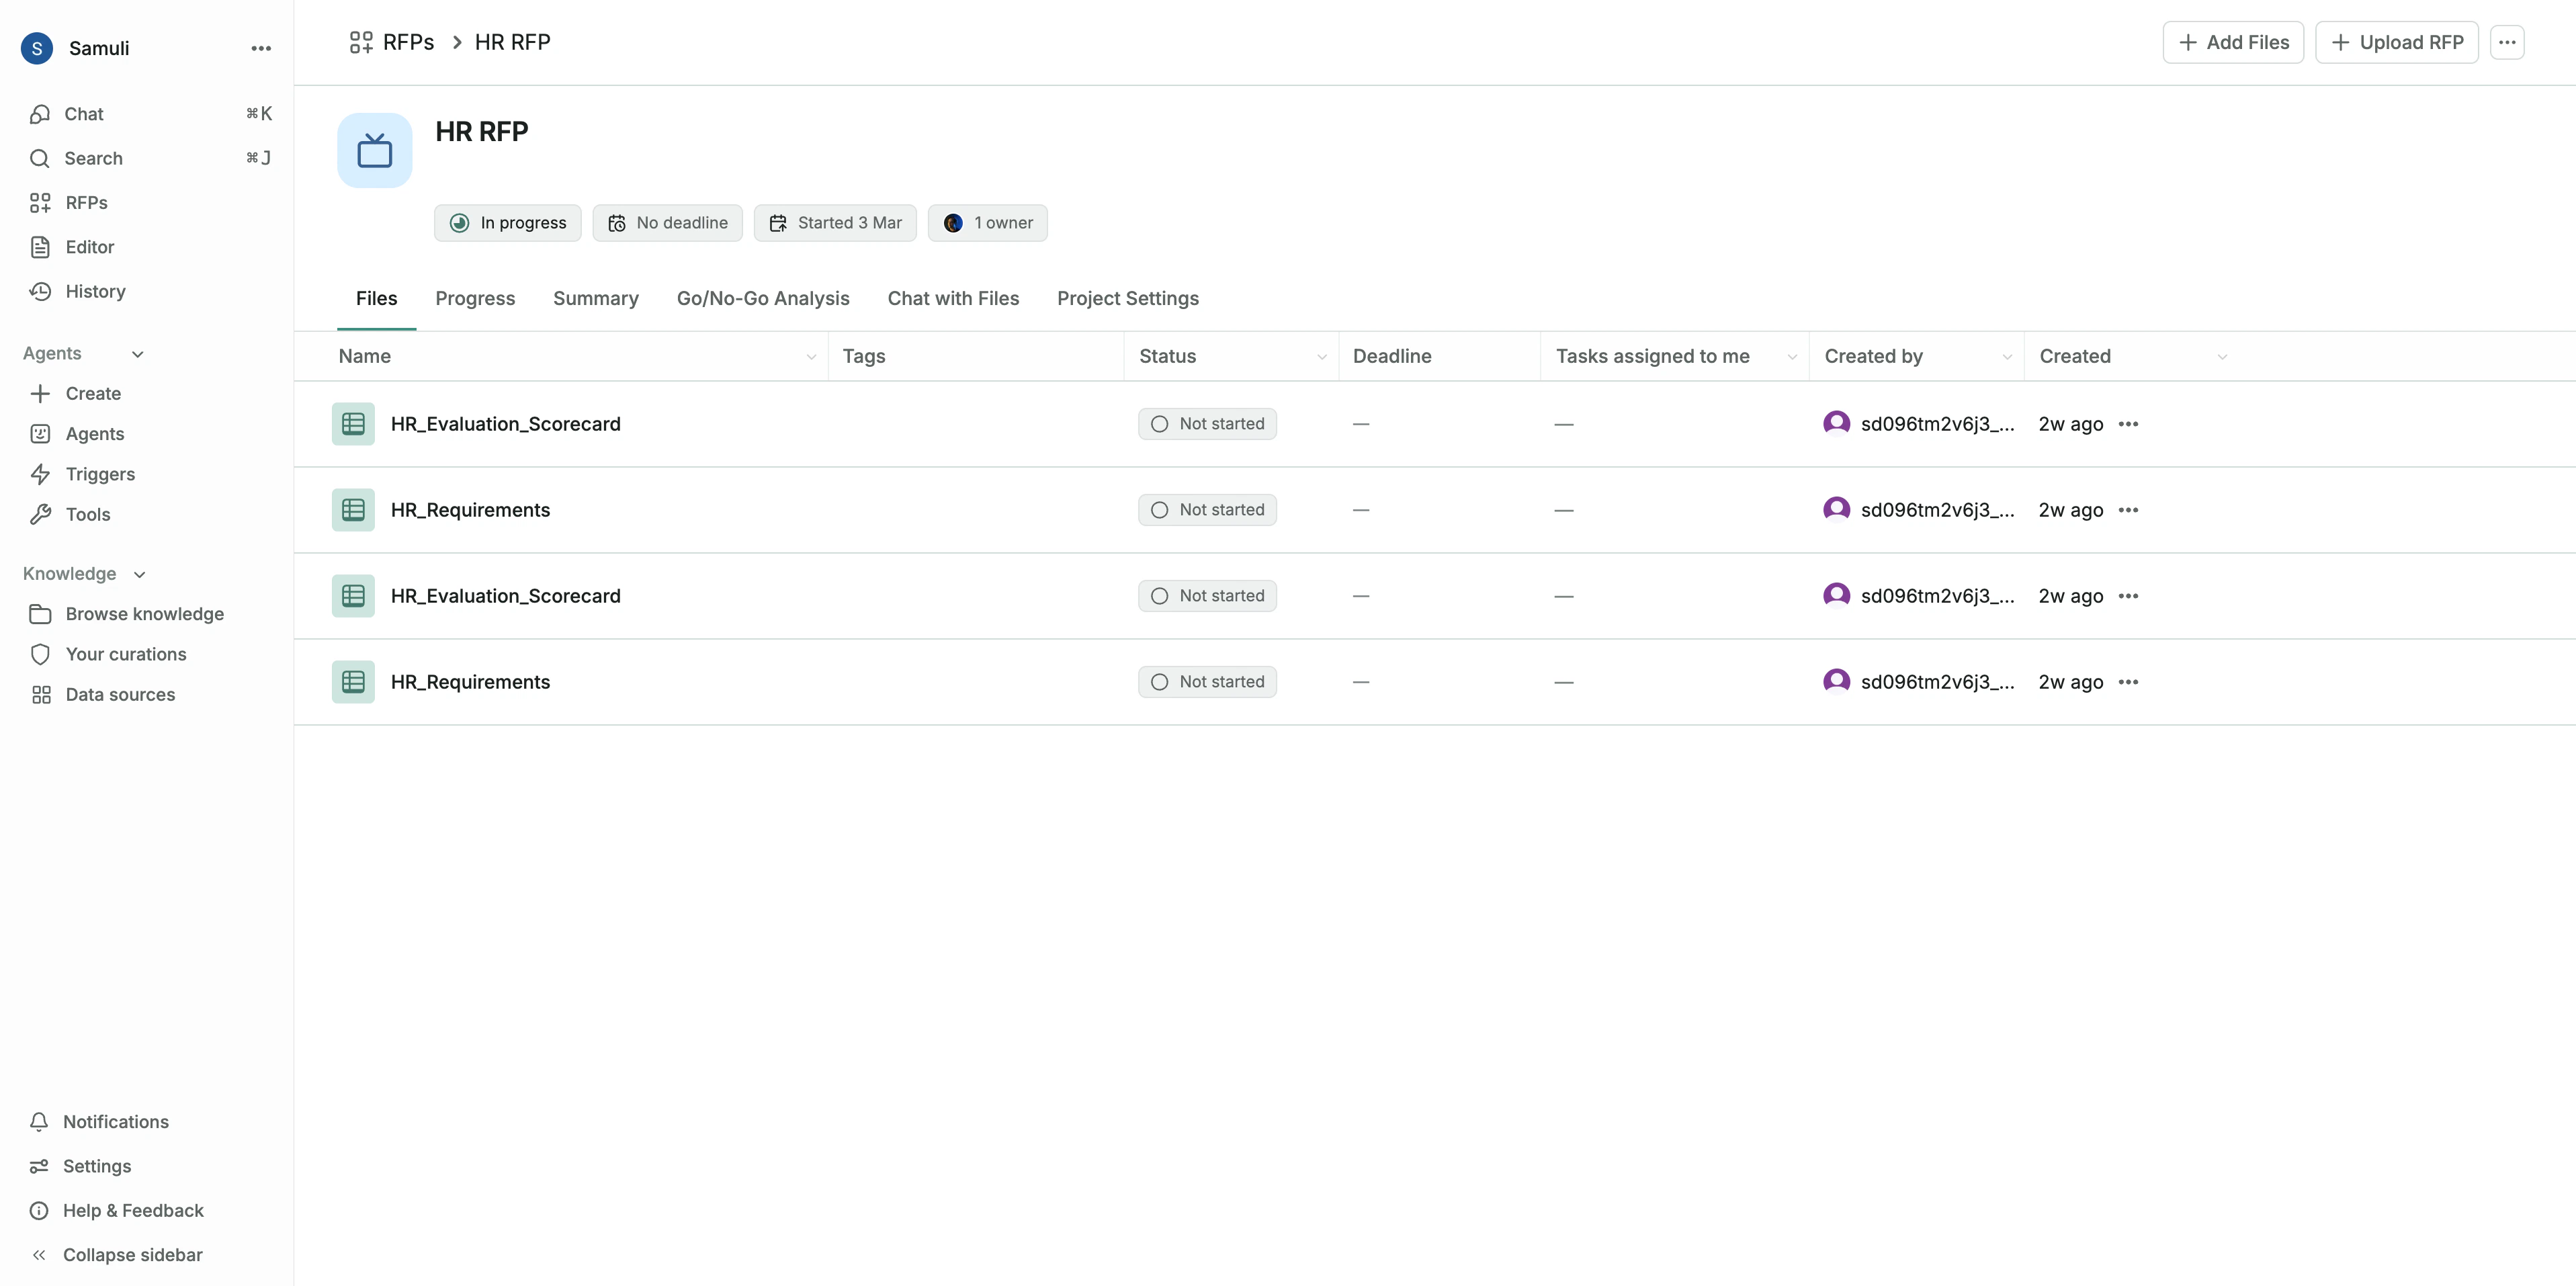
- Files: A central place to upload and manage all project-related documents, including RFPs and supporting files. From here, you can select a questionnaire to begin filling it out.
- Progress: A visual dashboard that tracks the overall completion status of the RFP. It shows the total number of questions (scope), how many are started versus completed, and lists any tasks assigned to you.
- Summary: Generate an AI-powered summary of all files within the project to get a quick overview of the scope and key requirements.
- Go/No-Go analysis: Uses an AI agent to evaluate the RFP documents against your company’s capabilities, providing a compliance score and a detailed breakdown of requirements to help you make an informed decision on whether to bid.
- Chat with files: Ask specific questions about the documents in your project, allowing you to clarify details without reading through every page.
- Project settings: Manage project members, their roles, and general project details. Owners can update the project’s status, set a deadline, or delete the project.
Preparing questionnaires and fill plan
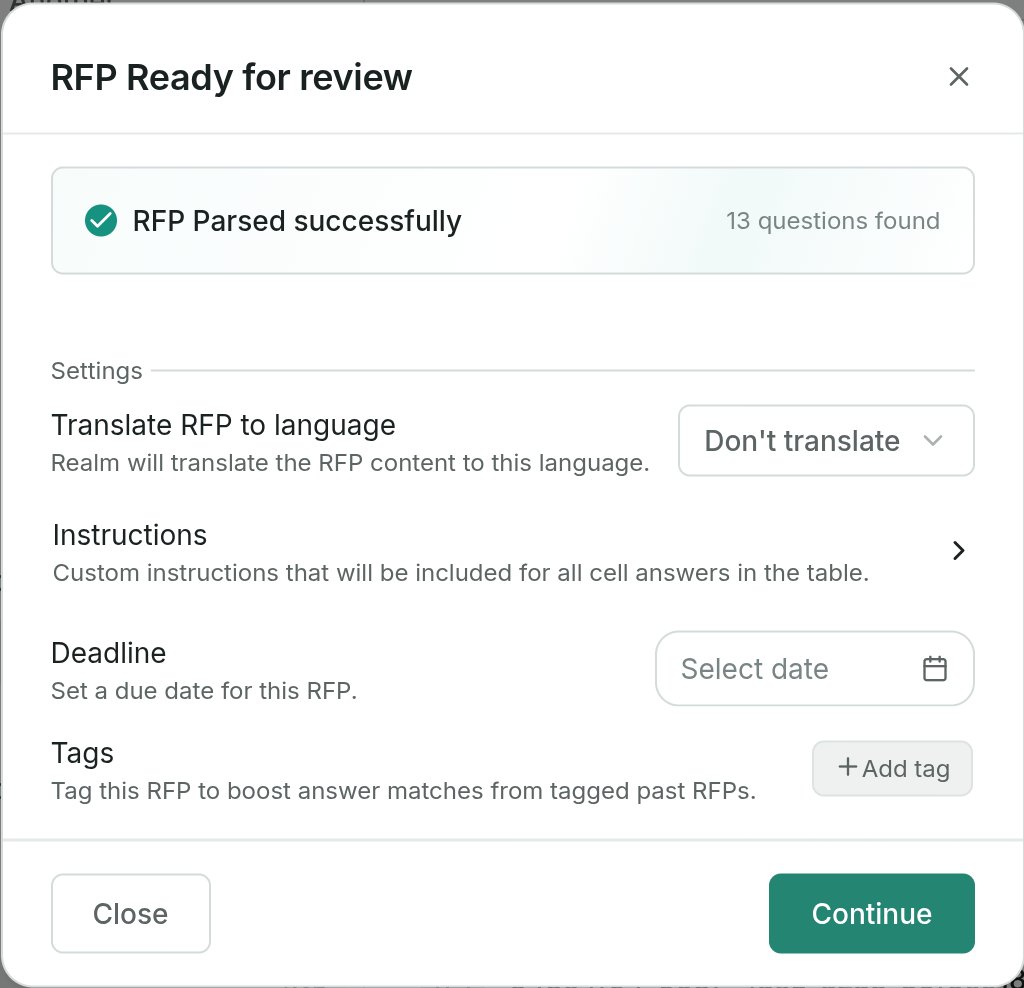
- Language translation: If the document is in a foreign language, you can translate it to your working language. When exporting the completed RFP, you can choose to export it in either language.
- Custom instructions: Provide custom instructions that will apply to all AI-generated answers.
- Deadline: Set a due date to keep your team on track and prioritize the project.
Answering questions

Navigating the RFP grid
Navigate between cells by clicking or using the arrow keys.Filling sections with AI
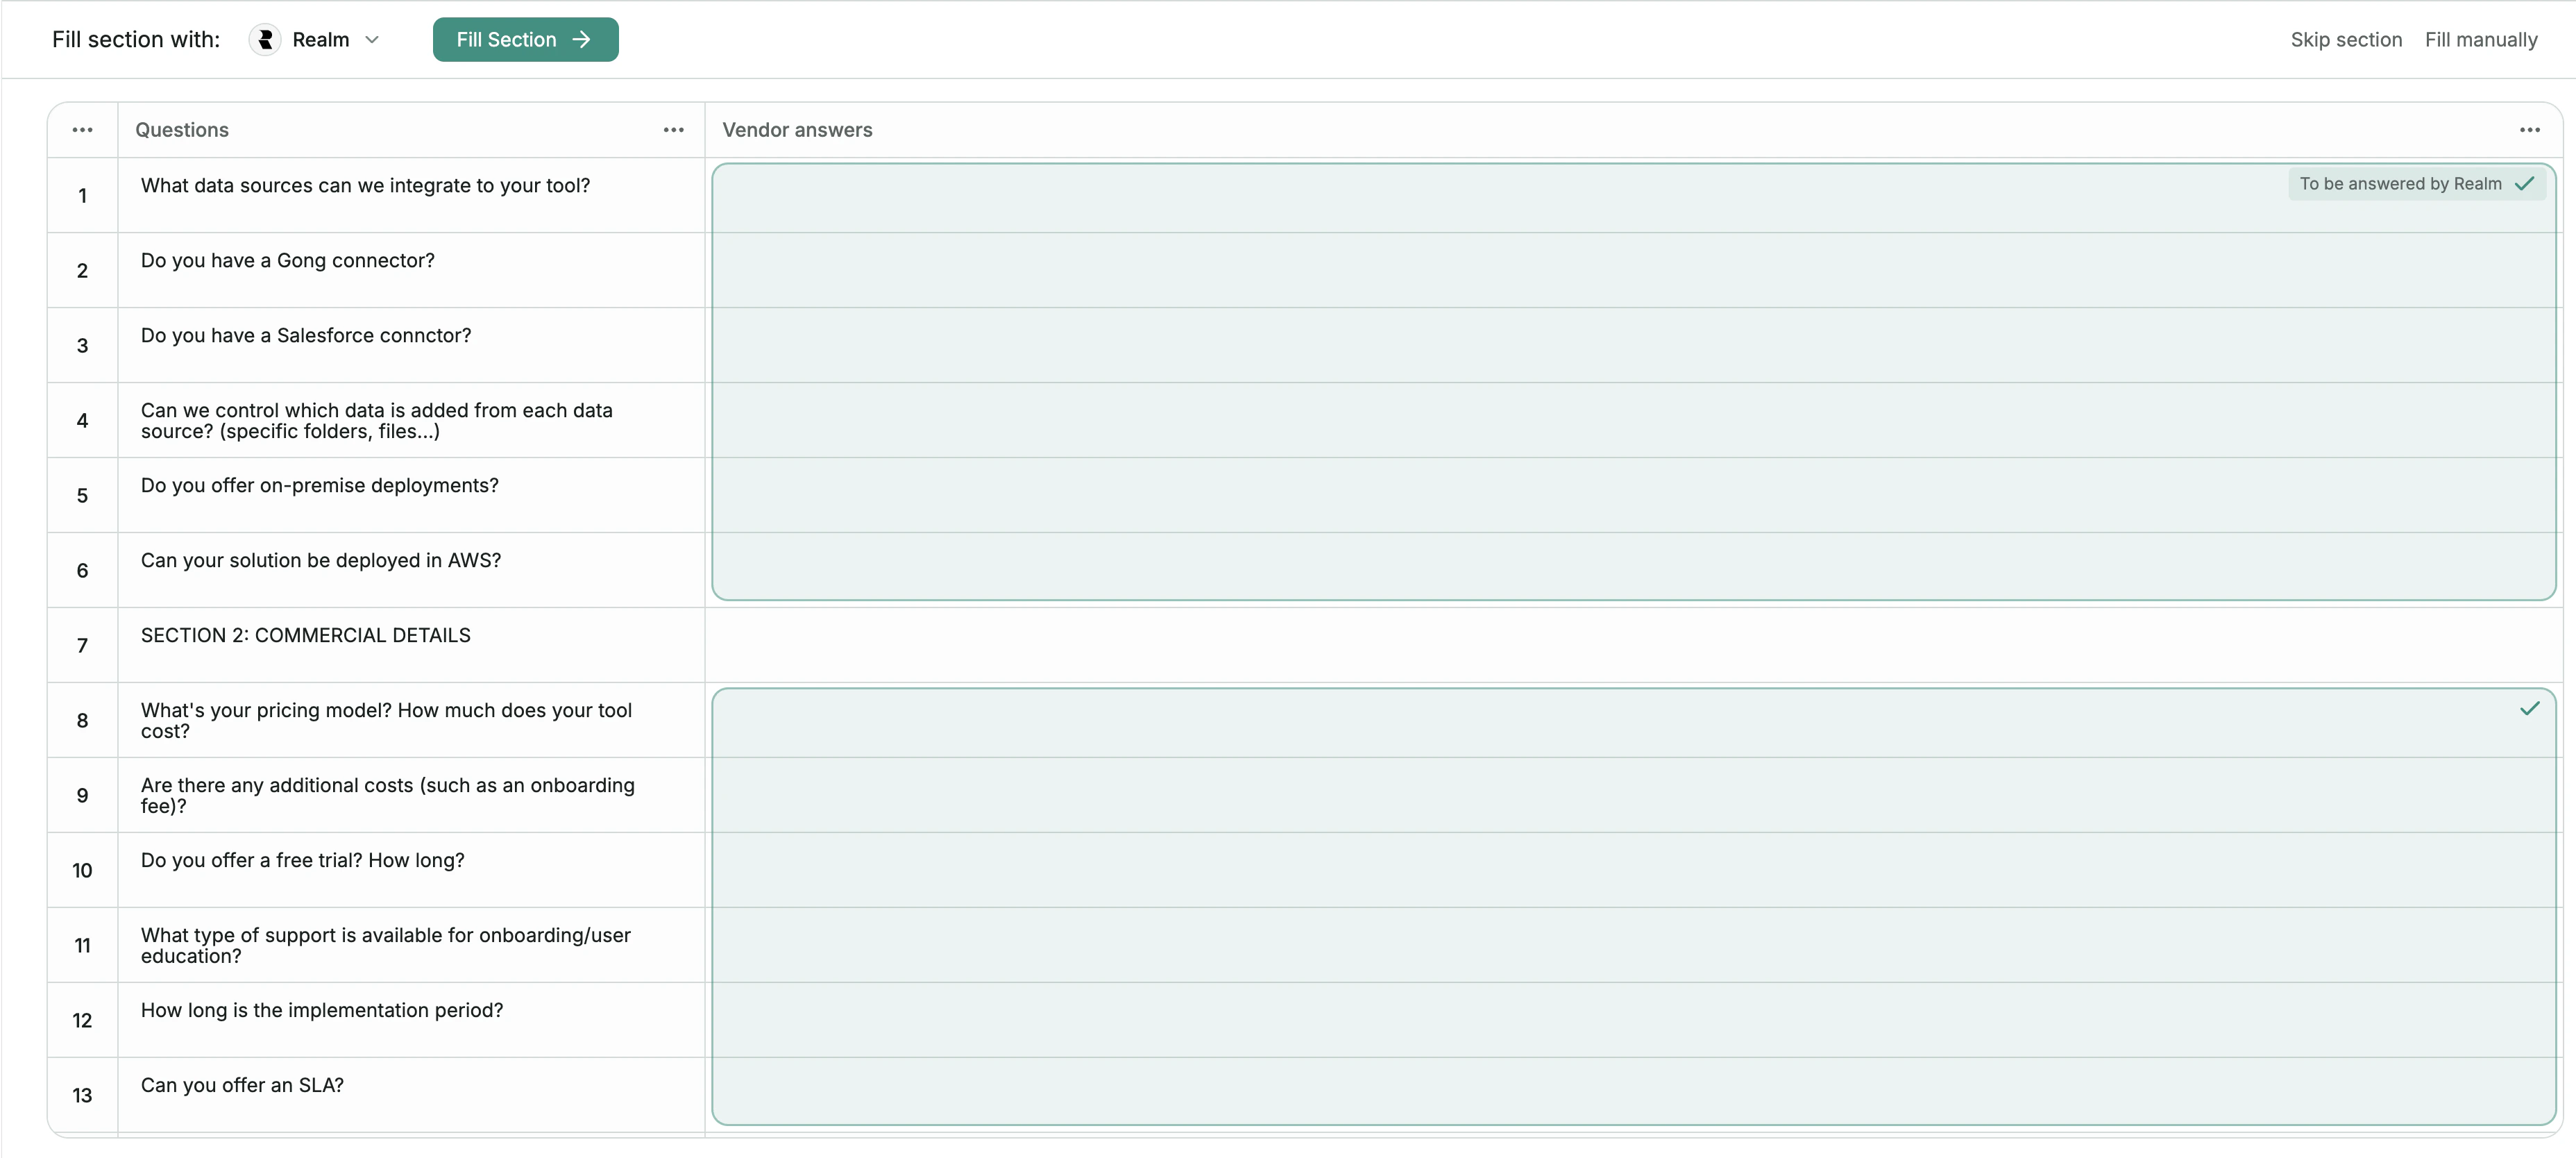
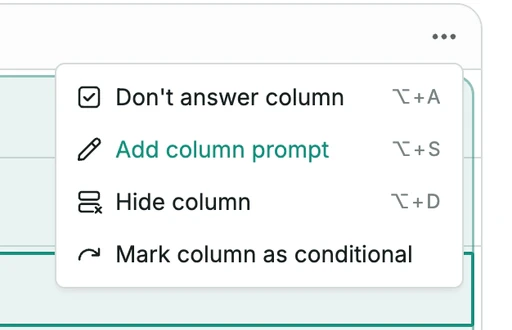
Column prompting
Assessing AI-generated answers
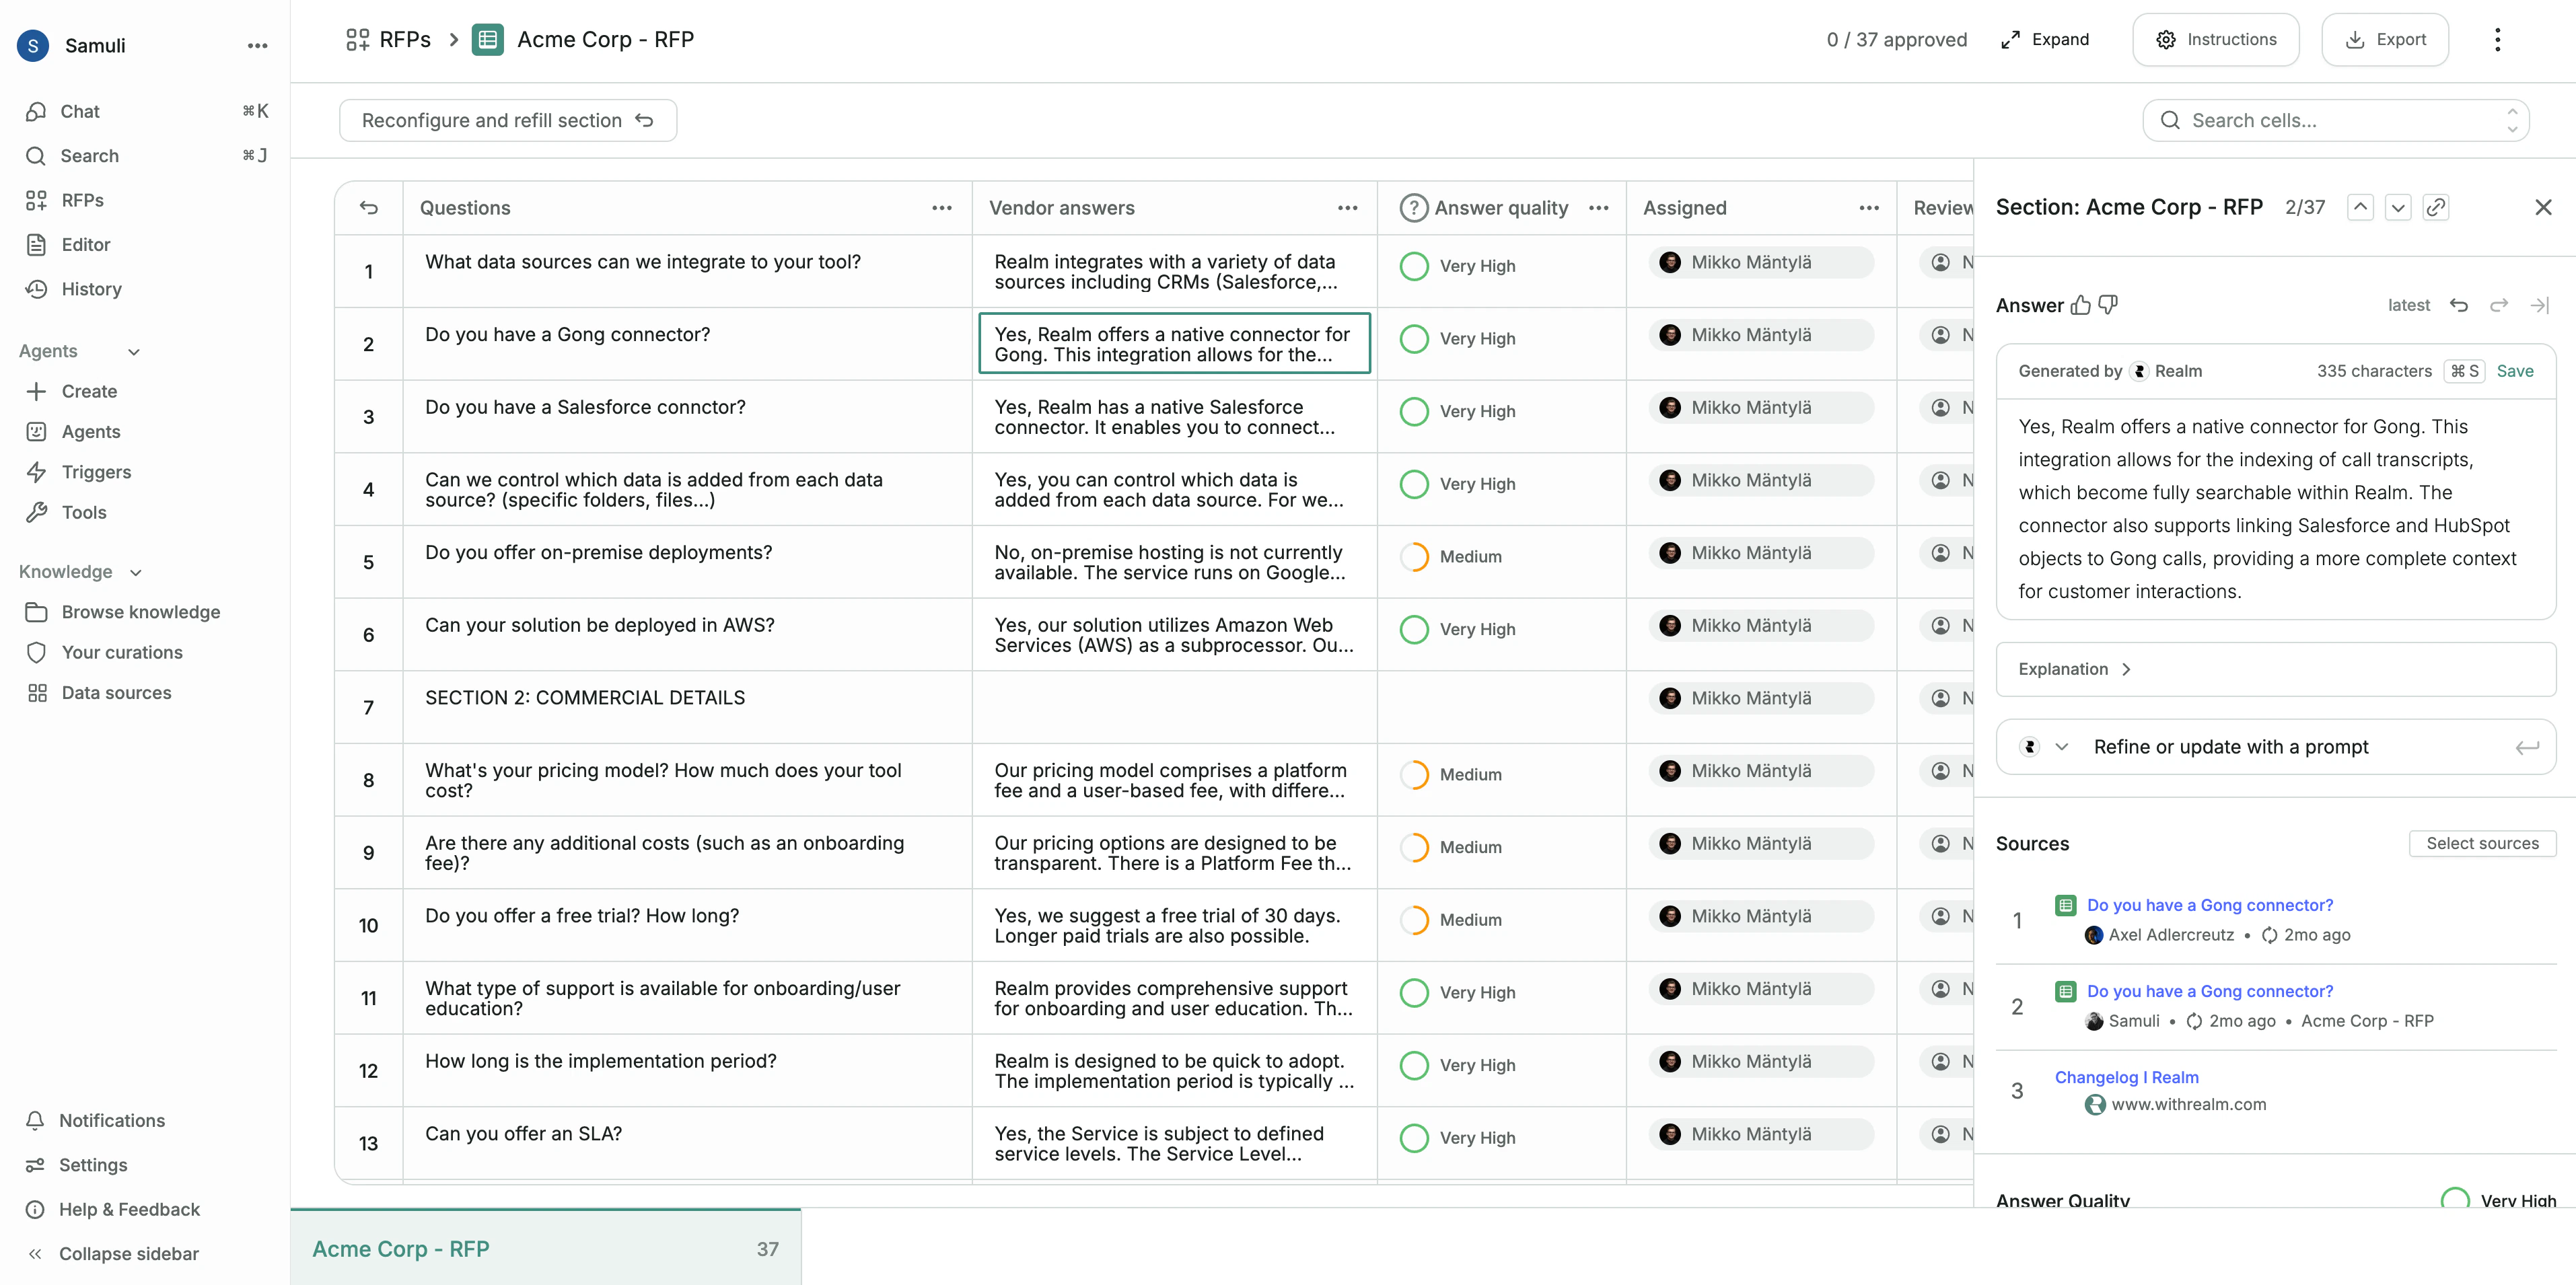
Reviewing sources
Click the answer to open the Answer details panel on the right side of the RFP grid. You can review the sources used to generate an answer and see an explanation of how Realm produced it.Answer quality score
The Answer quality score appears next to each answer in the RFP grid. A detailed breakdown is available in the Answer details panel. See Understanding the answer quality score for more details.Editing answers
Manually editing answers
Edit any AI-generated answer by clicking it in the RFP grid or in the Answer details panel.Editing answers with AI
Use the Refine or update with a prompt feature in the Answer details panel to give the AI further instructions for regenerating the answer.Collaboration
Assigning work
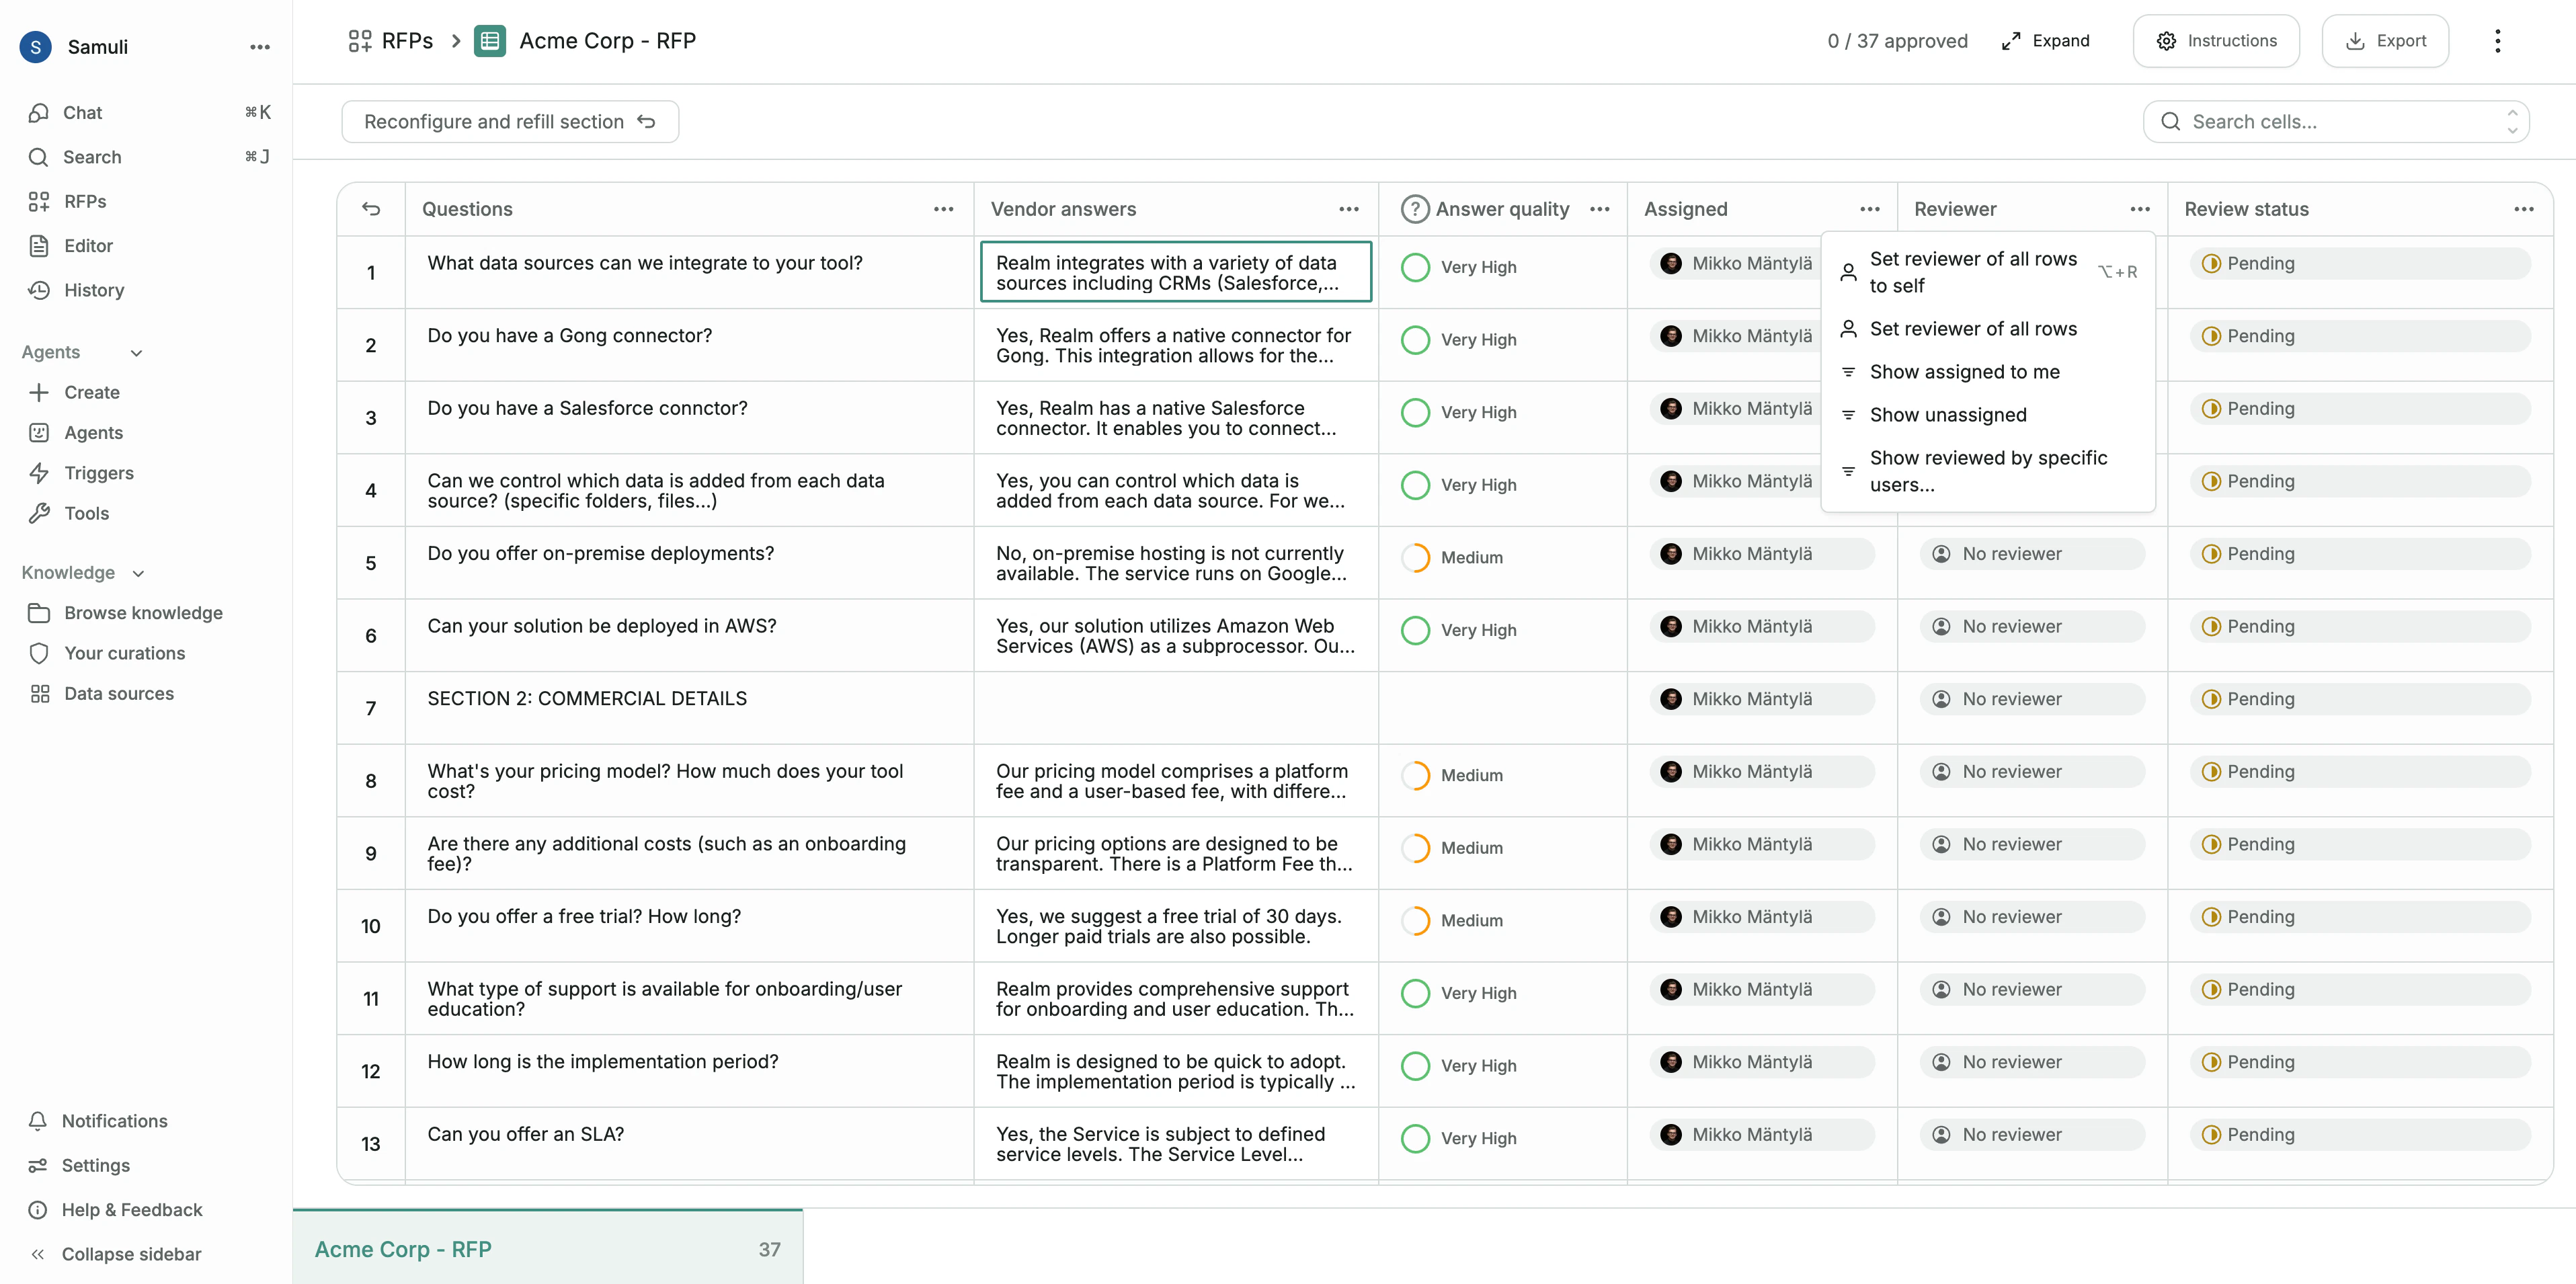
Assign individual questions or entire sections to team members. Click the Assigned column in the RFP grid to select a user.Review process
Optionally, designate a reviewer for each question to ensure quality and accuracy. Click the Reviewer column in the RFP grid to assign a reviewer.Review status
Use the Review status column in the RFP grid to track the progress of each answer. Statuses include Pending, Ready for review, Edits requested, and Approved.Leaving comments
Add comments to any question or answer by clicking it to open the Answer details panel on the right side of the RFP grid.Finalizing and exporting
Marking as complete
Once all questions are answered and approved, you can mark the RFP as complete. This also adds the questions and answers to your knowledge base, improving future AI suggestions.Exporting the file
Click Export to download the completed questionnaire. There are two options:- Fill the original file: Fills the answers into the original RFP file. Note that any rows added during the process will not be included.
- Export as a new spreadsheet: Exports the questionnaire as a new Excel file.
Word and PDF questionnaires cannot be exported in their original format and will always be exported as a new spreadsheet.