MCP (Model Context Protocol) is an open protocol for connecting agents to external tools and data sources. You can add custom MCP servers to Realm to extend your agents’ capabilities beyond built-in tools.
MCP servers are not available on trial plans.
Adding a server
Open MCP settings
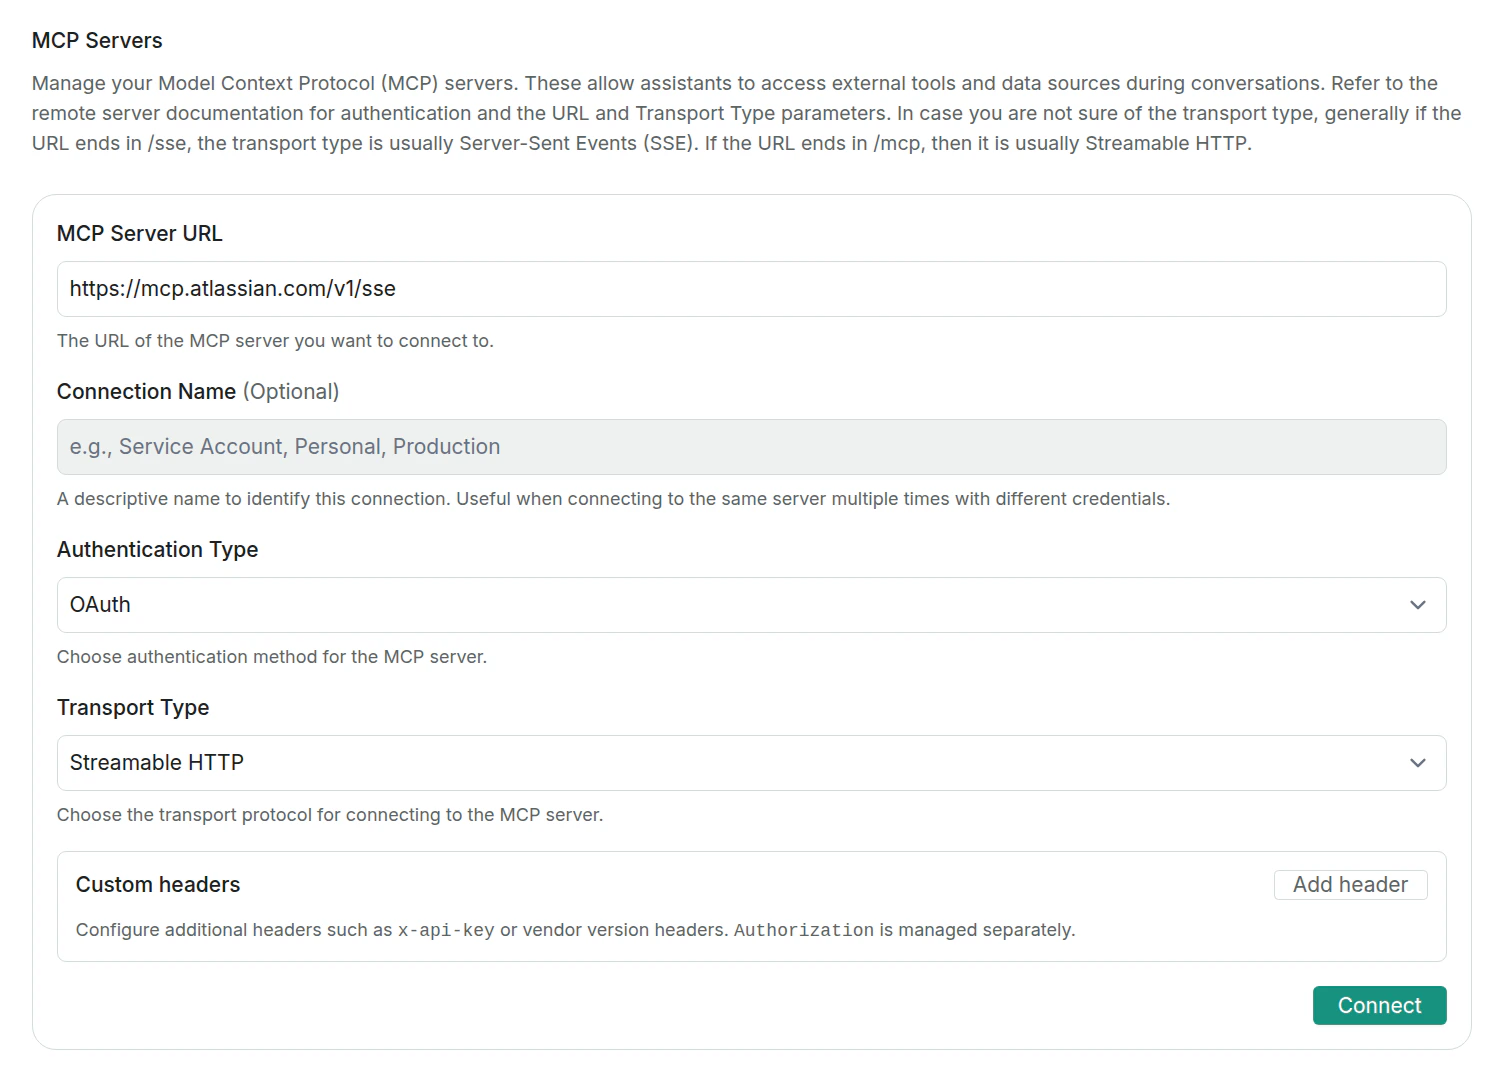
Click Add MCP Server from the Tools page. You can either connect a Featured MCP Server with one click, or add a custom server manually. Enter server URL
Provide the URL of the MCP server.
Choose transport type
Select HTTP or SSE (Server-Sent Events).
Configure authentication
Choose OAuth or Bearer Token and enter the required credentials. You can also add custom headers (e.g. x-api-key or vendor version headers). The Authorization header is managed separately by the authentication type.
Name the connection
Optionally give the connection a descriptive name. This is useful when connecting to the same server multiple times with different credentials.
Add the server
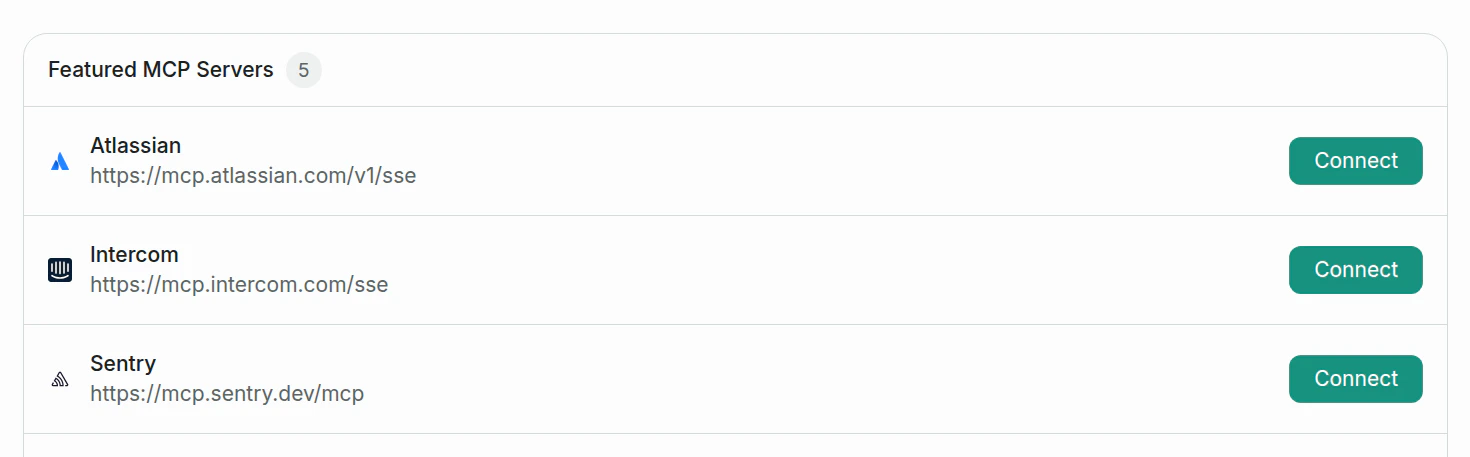
Click Connect to complete the setup. Featured servers
Realm highlights these featured MCP servers for quick one-click setup:
Managing servers
Once added, you can reconnect or delete MCP servers from the Tools page.
Admins can also manage MCP connections created by other admins in the same
workspace, including updating connection names, bearer tokens, and custom header
values. For OAuth connections, reconnection must be performed by the admin who
owns the connection. Other admins can remove the OAuth connection and create a
new one with their own credentials if needed.